
Turtle
I was contracted in 2020 to make a giant turtle for the new swim school opening at Troy Gymnastics in Troy, MI. The project stretched over 2 years due to a new job, moving, and having a child. The shell was made on site since it is approximately 14’ wide and 18’ long. The final turtle was debuted in July 2022.
This was my first sculpture.
Design
-
![]()
Hand Sketches
Initial sketches based off customer pictures.
-
![]()
CAD Modeling
Translating the hand sketches into CAD models.
-
![]()
Revisions
The fins were moved to a swimming position to reduce customer interaction and improve access to the desk.
-
![]()
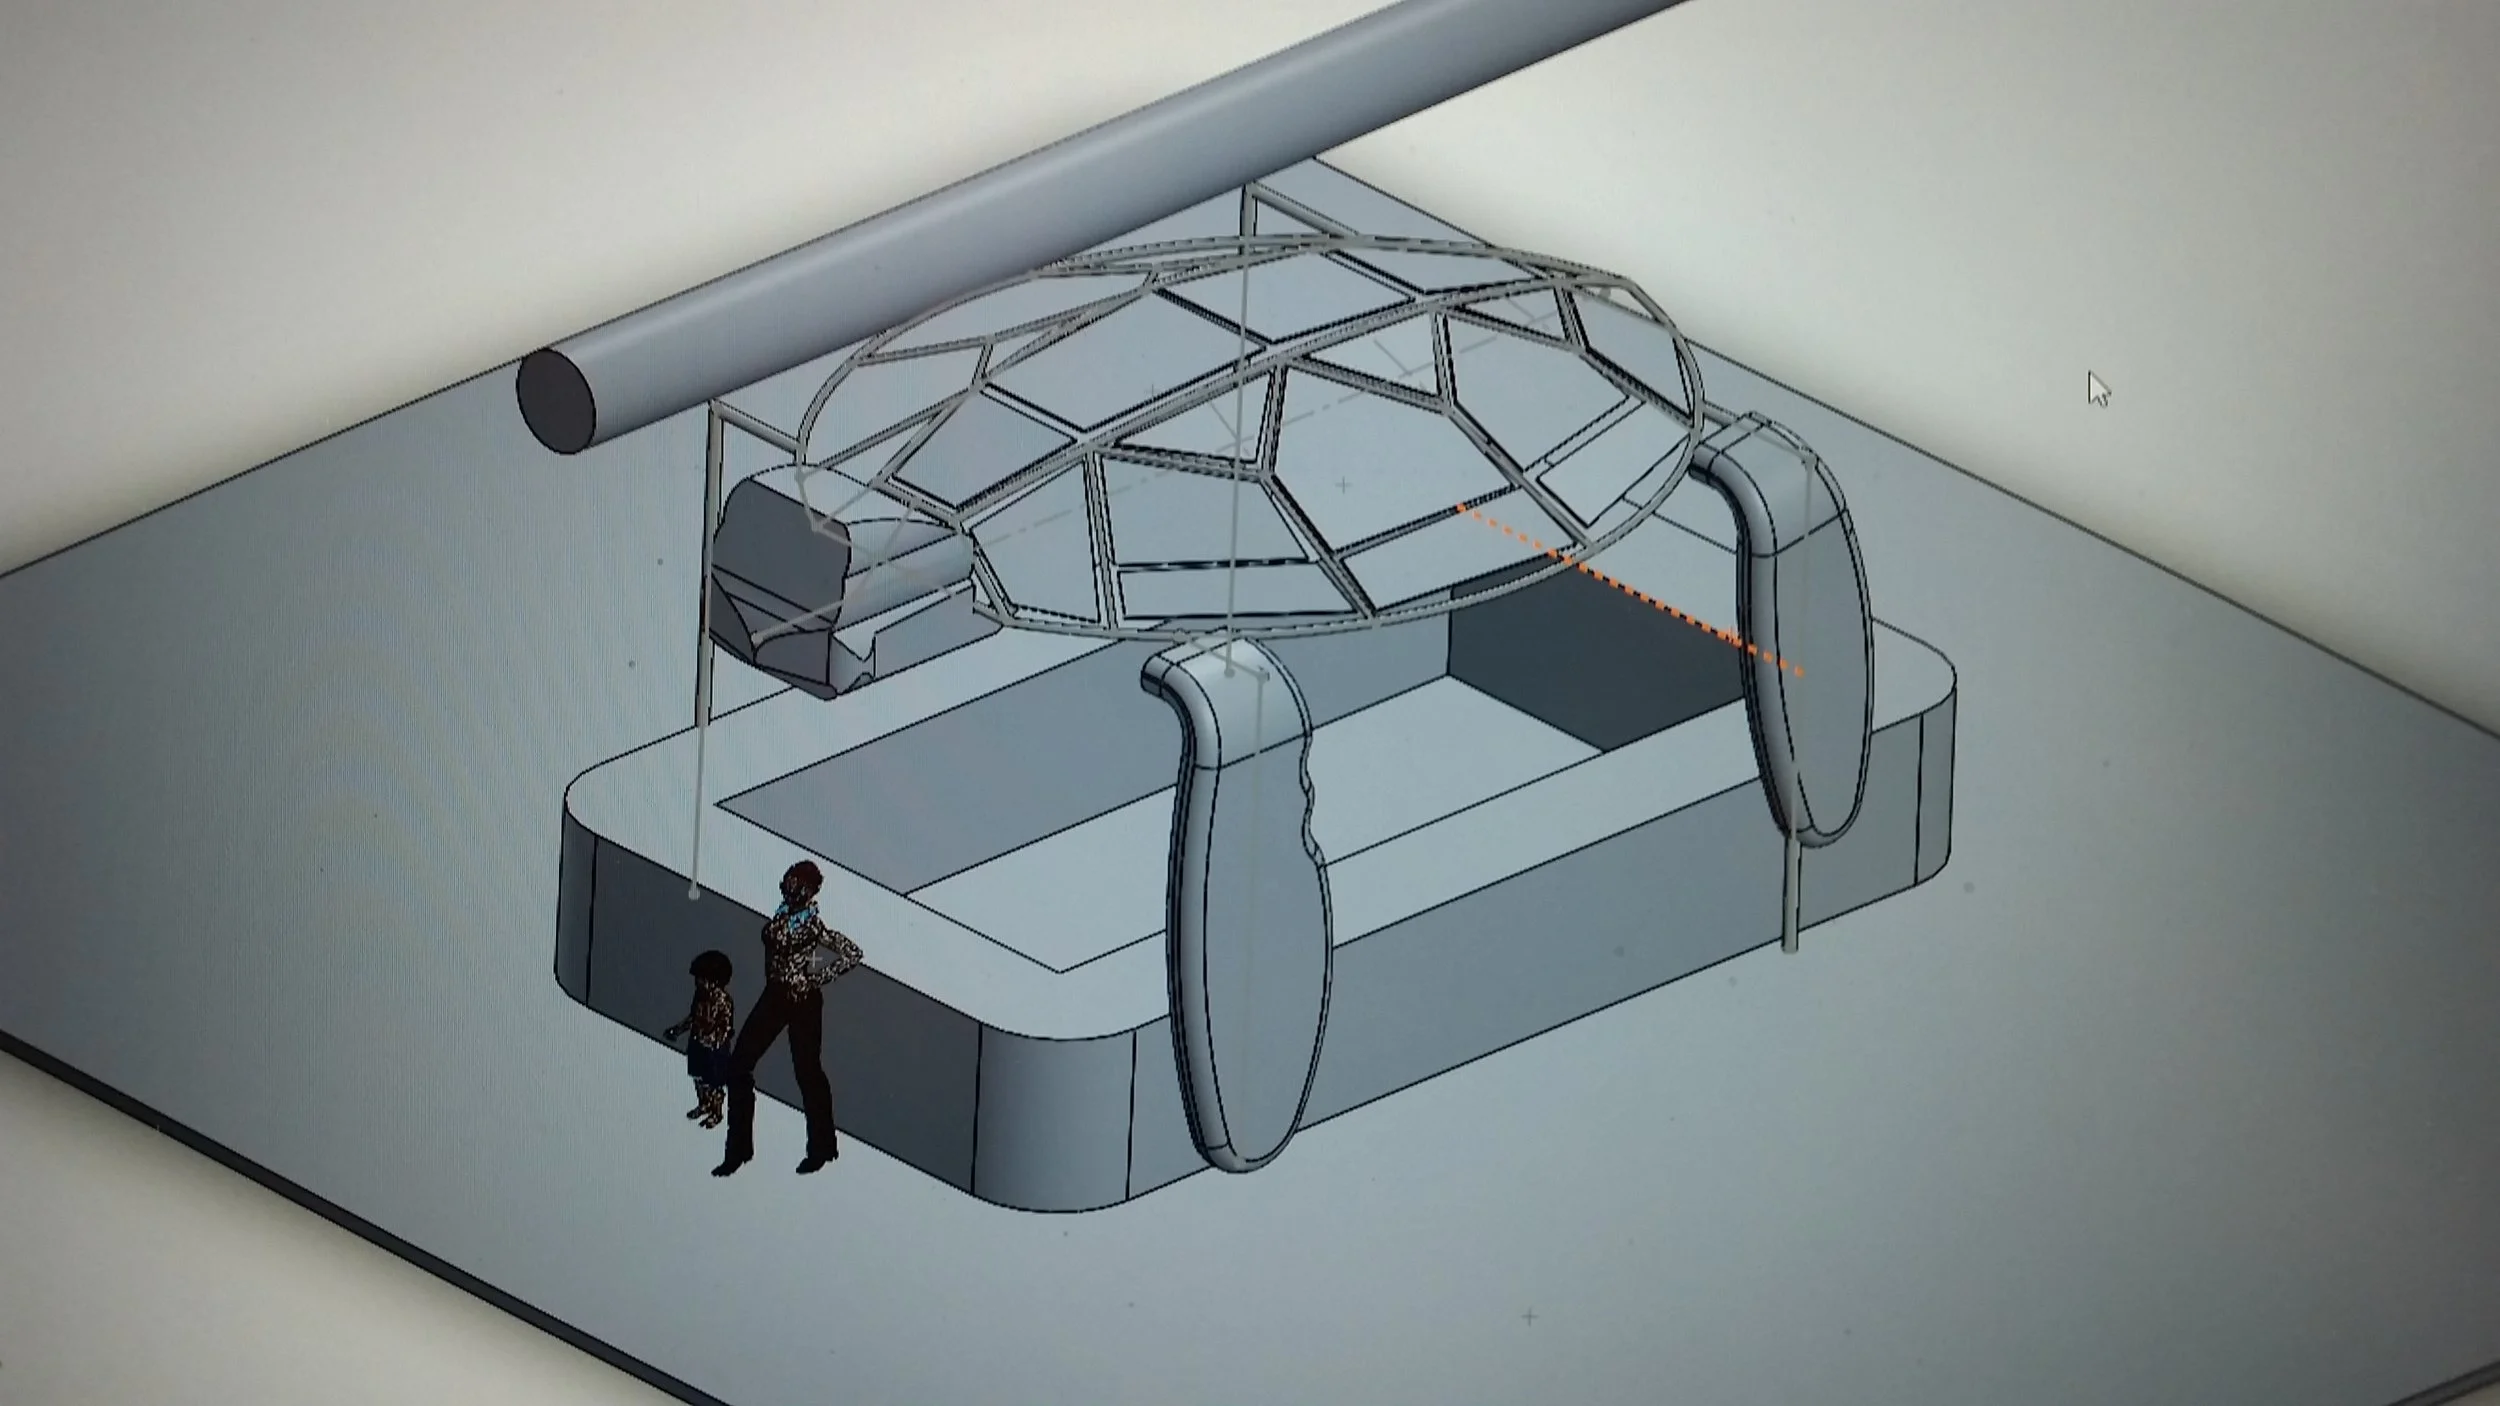
Perspective
This is the view customers will see upon entering the facility.
-
![]()
Practice Sculpting
First attempt at sculpting the face.
-
![]()
Sculpting Practice
This was my test to give me confidence I could make it look as intended.
-
![]()
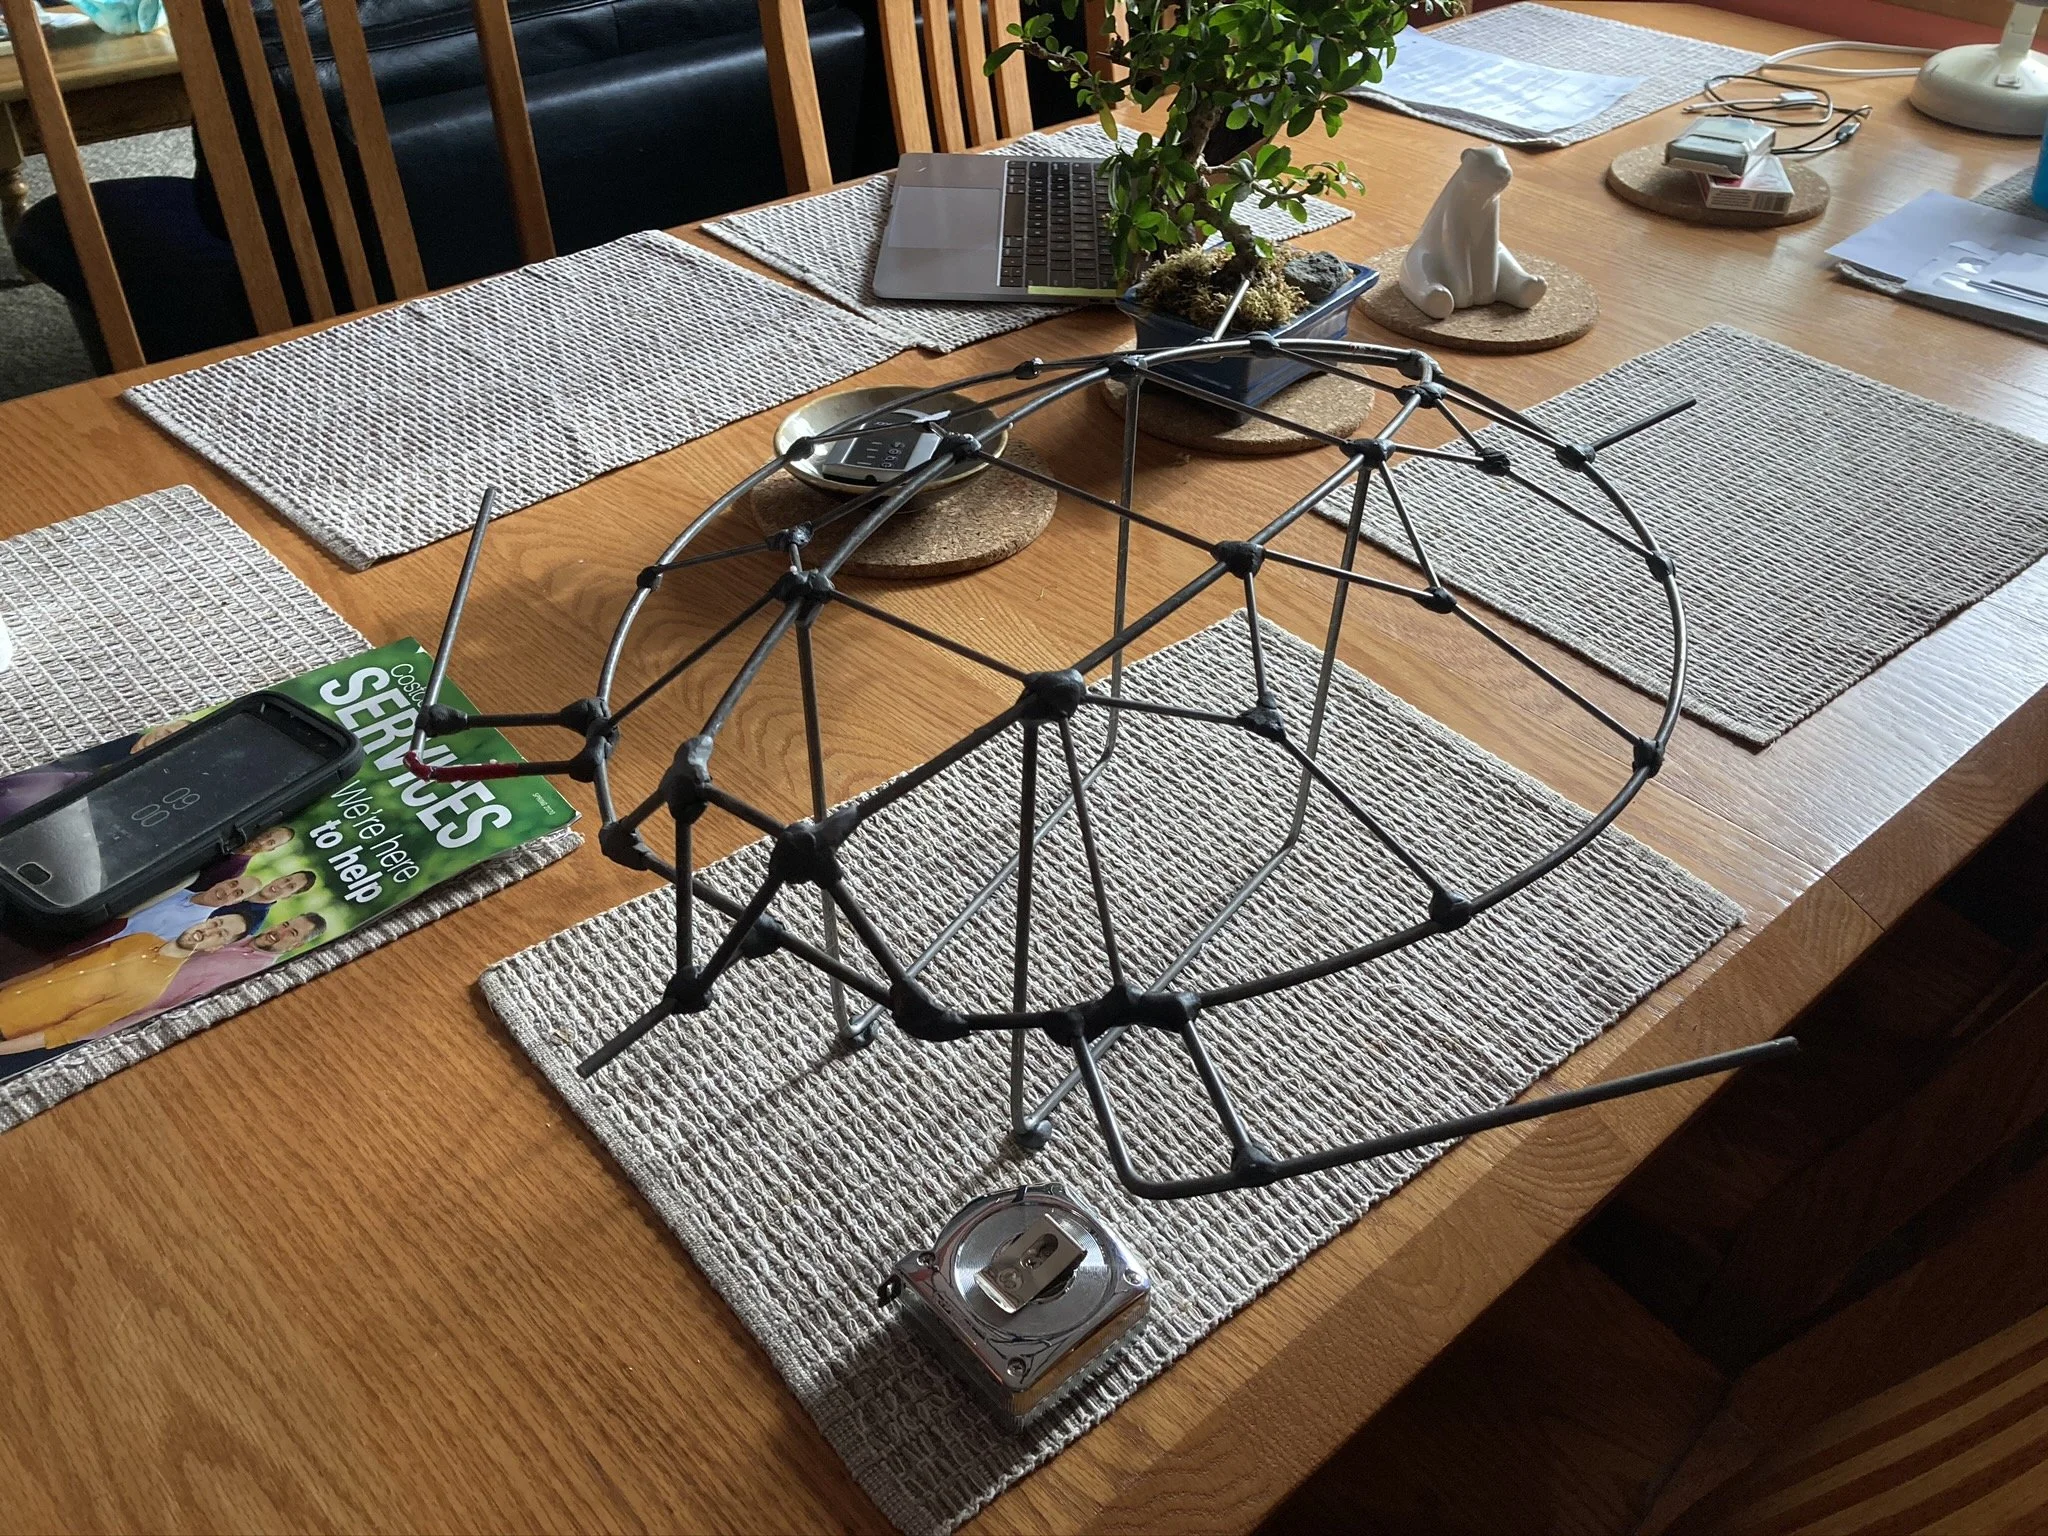
Shell Structure Model
1/24th scale model of the shell structure.
-
![]()
Scale Model
1/24th scale model with fins, head, and shell pieces.
-
![]()
1/24 Scale Model: Entry View
This will be the customers view of the turtle upon entry.


Head and Fin Construction
-
![]()
3D Scan and Slice
I scanned the model head and sliced it in 2 inch thick clices.
-
![]()
Tracing Slices
Each slice got traced and cut out of foam.
-
![]()
Tracing Slices
Once traced, each layer was cut out.
-
![]()
Gluing Layers
Layers were glued together in stages using gorilla glue and water jugs as weight.
-
![]()
Gluing Layers
Gluing was done in about 5 stages.
-
![]()
Completed Stack
Completed stack matches the CAD.
-
![]()
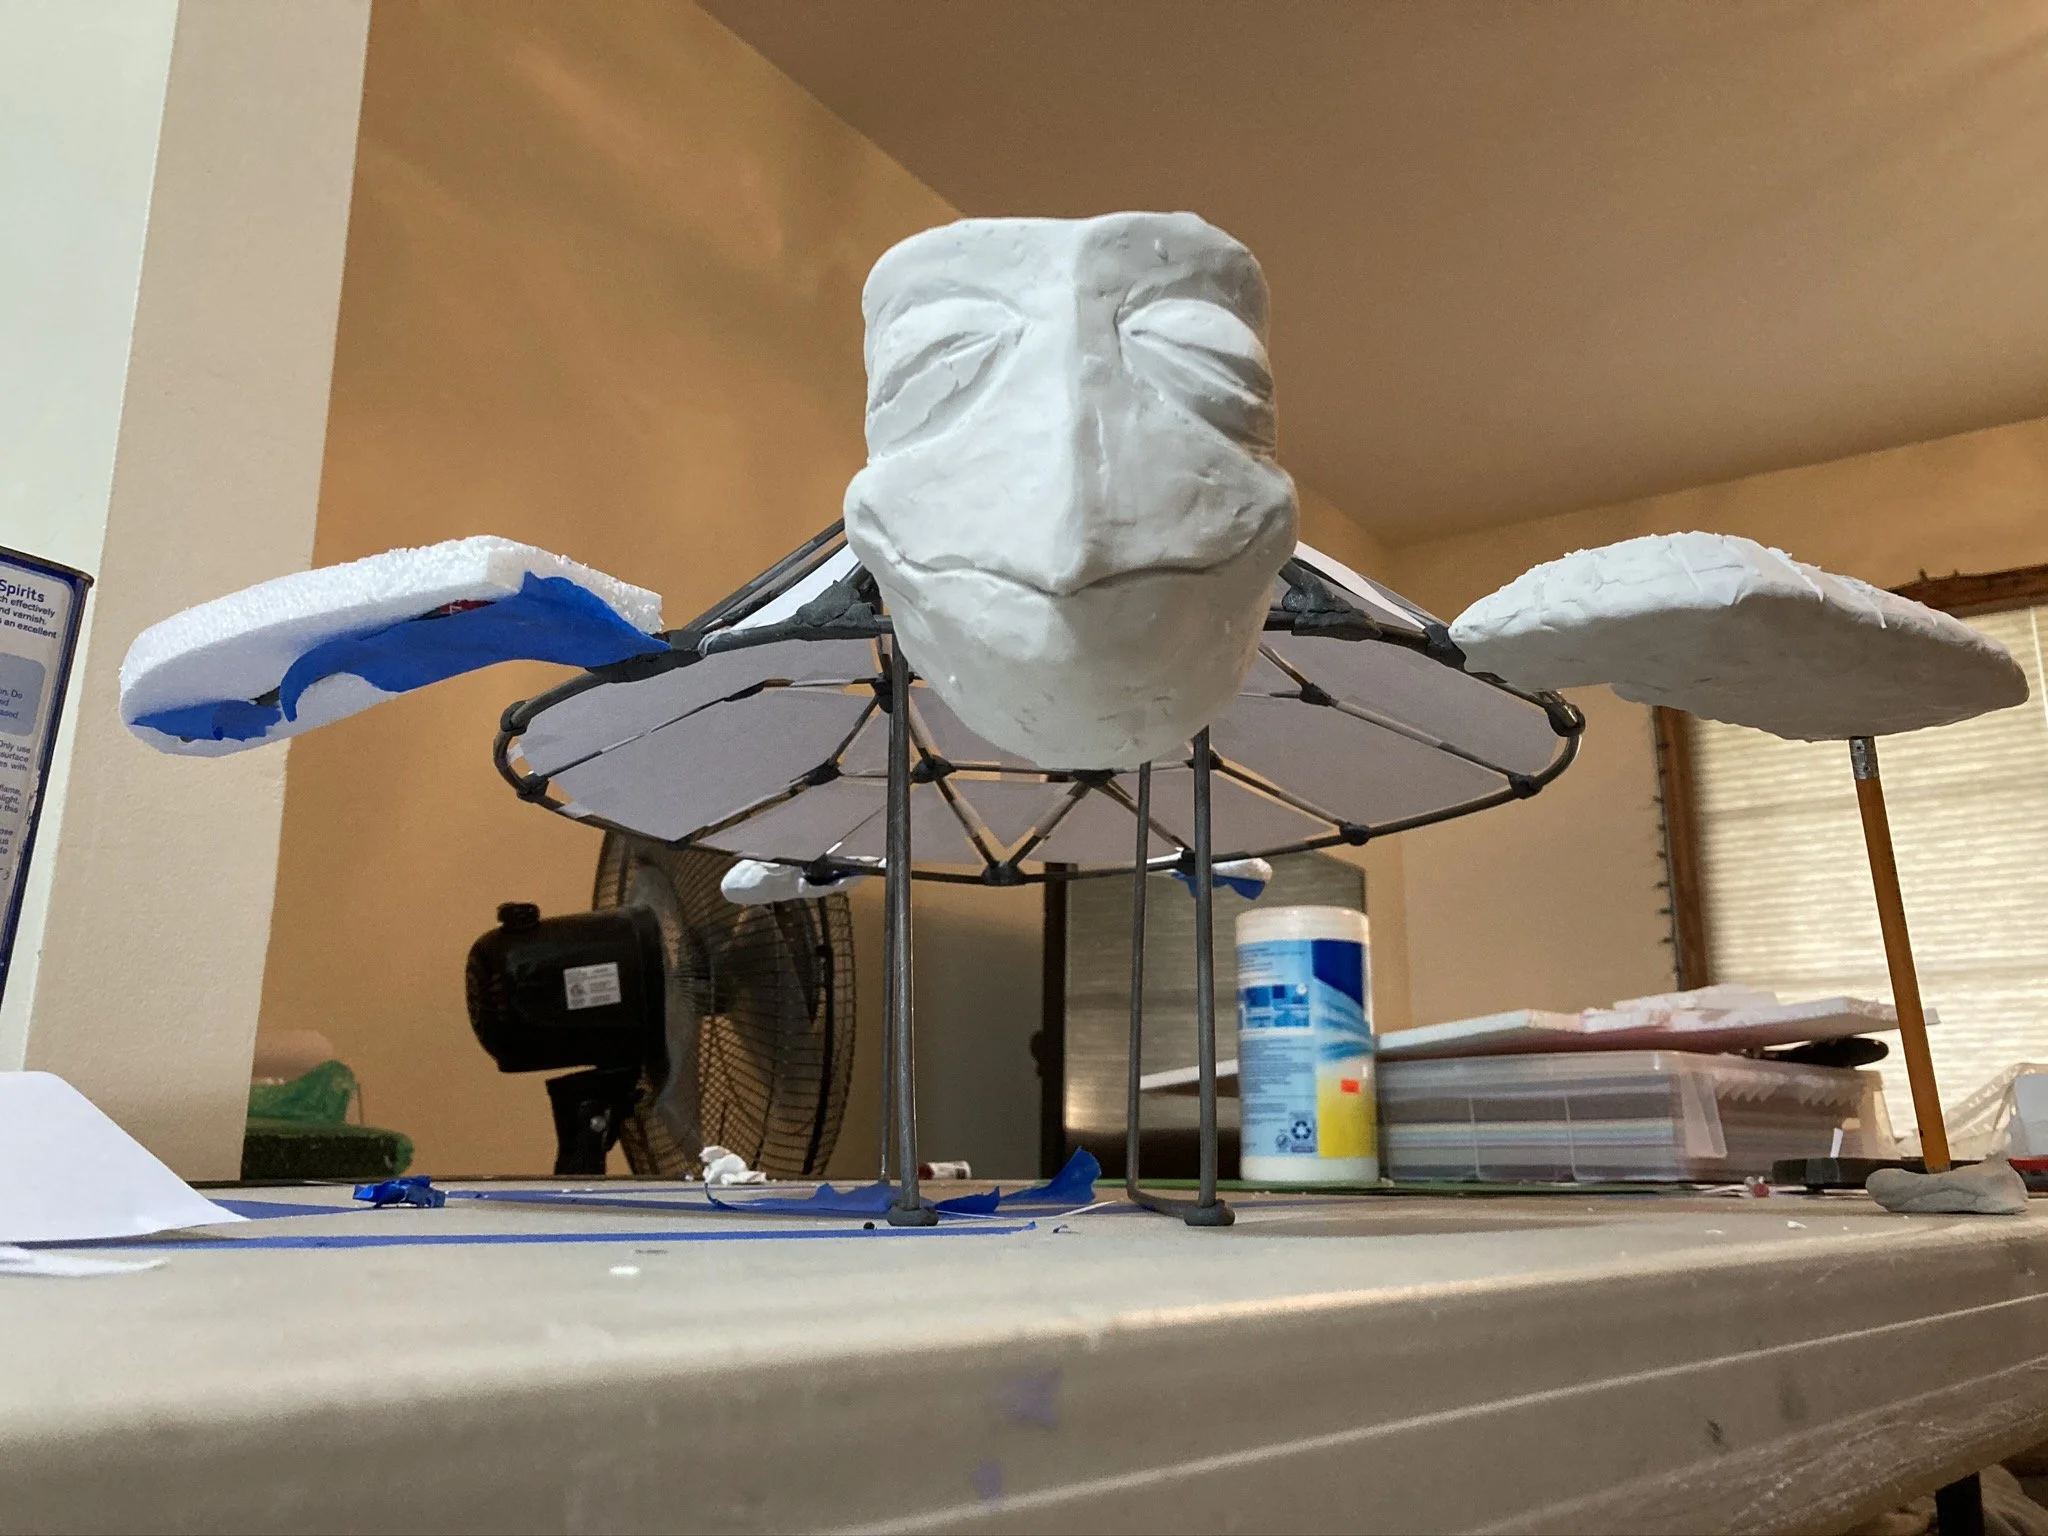
Foam vs Model
Using the scale model head as a guide for carving.
-
![]()
Cutting Detail
I used a pneumatic rotary carver to cut the detailed features.
-
![]()
Cutting Detail
A side view of the detailed eyes and mouth.
-
![]()
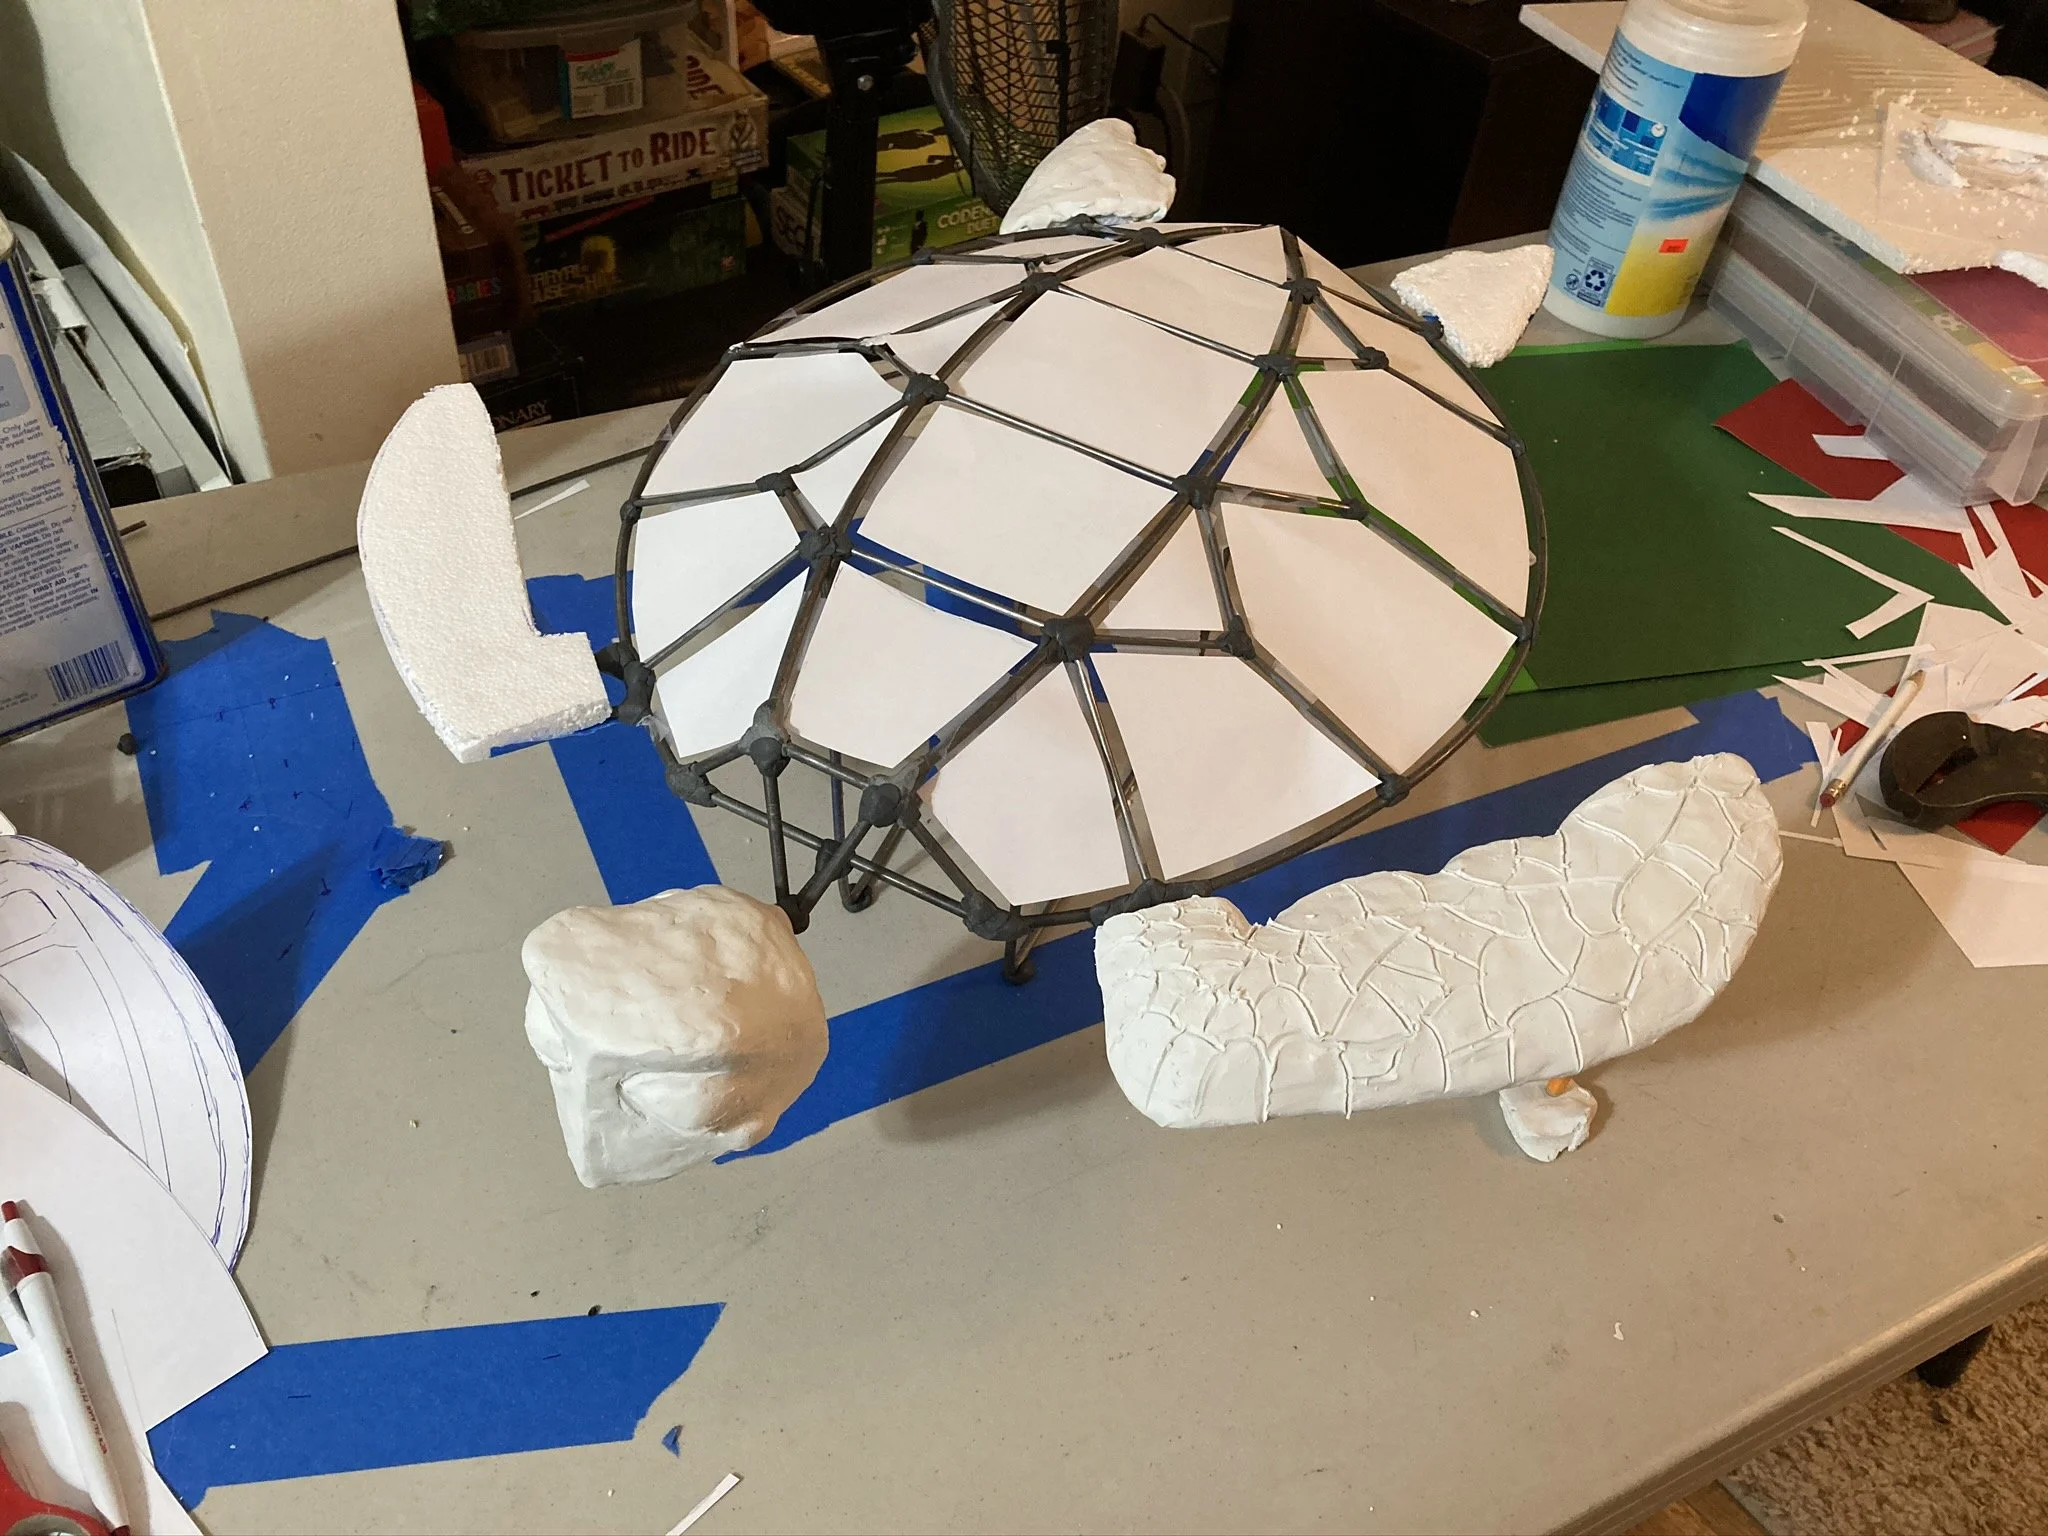
Large fin glue up
The large fins were 4’ wide and 10’ long.
-
![]()
Carving fins
-
![]()
Carving
Fins were carved with a grinder and super course burr wheel.
-
![]()
Back Fins Glue Up
Gluing the fins with gorilla glue and weight. Back fins are 4’ x 4’.
-
![]()
Back Fin Carving
Smaller, but just as messy as the front fins.
-
![]()
Back Fin Carving: Complete
I made the fins as symmetrical as possible.
-
![]()
All Foam Carving: Complete
Progress shot of all the foam components before fiberglassing.


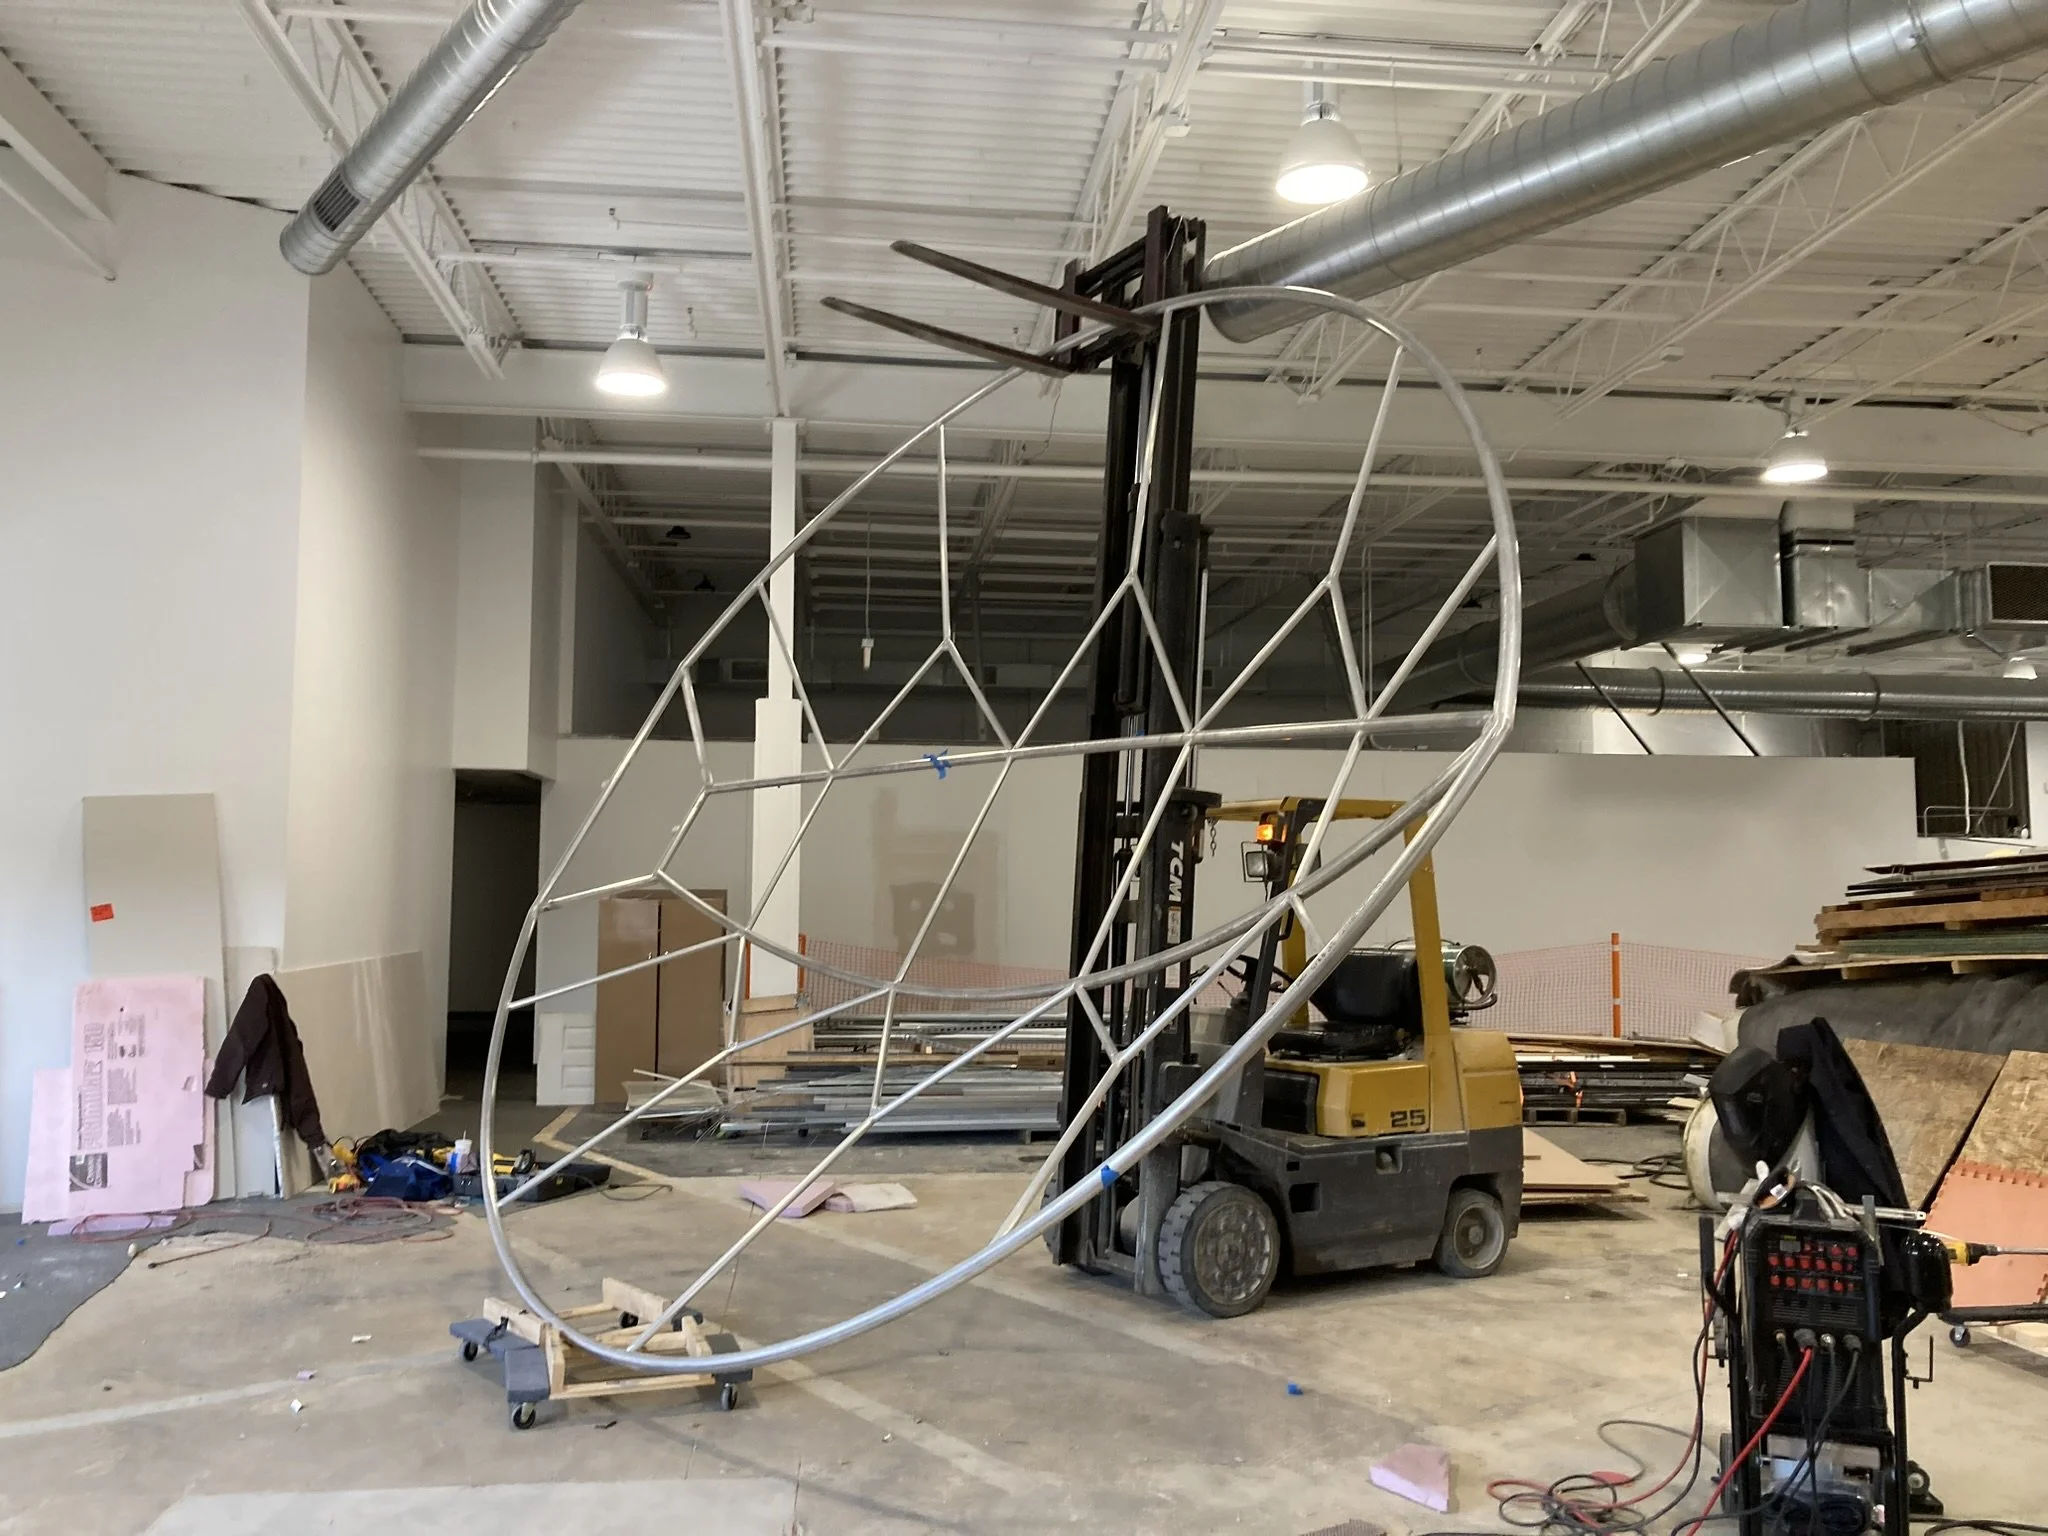
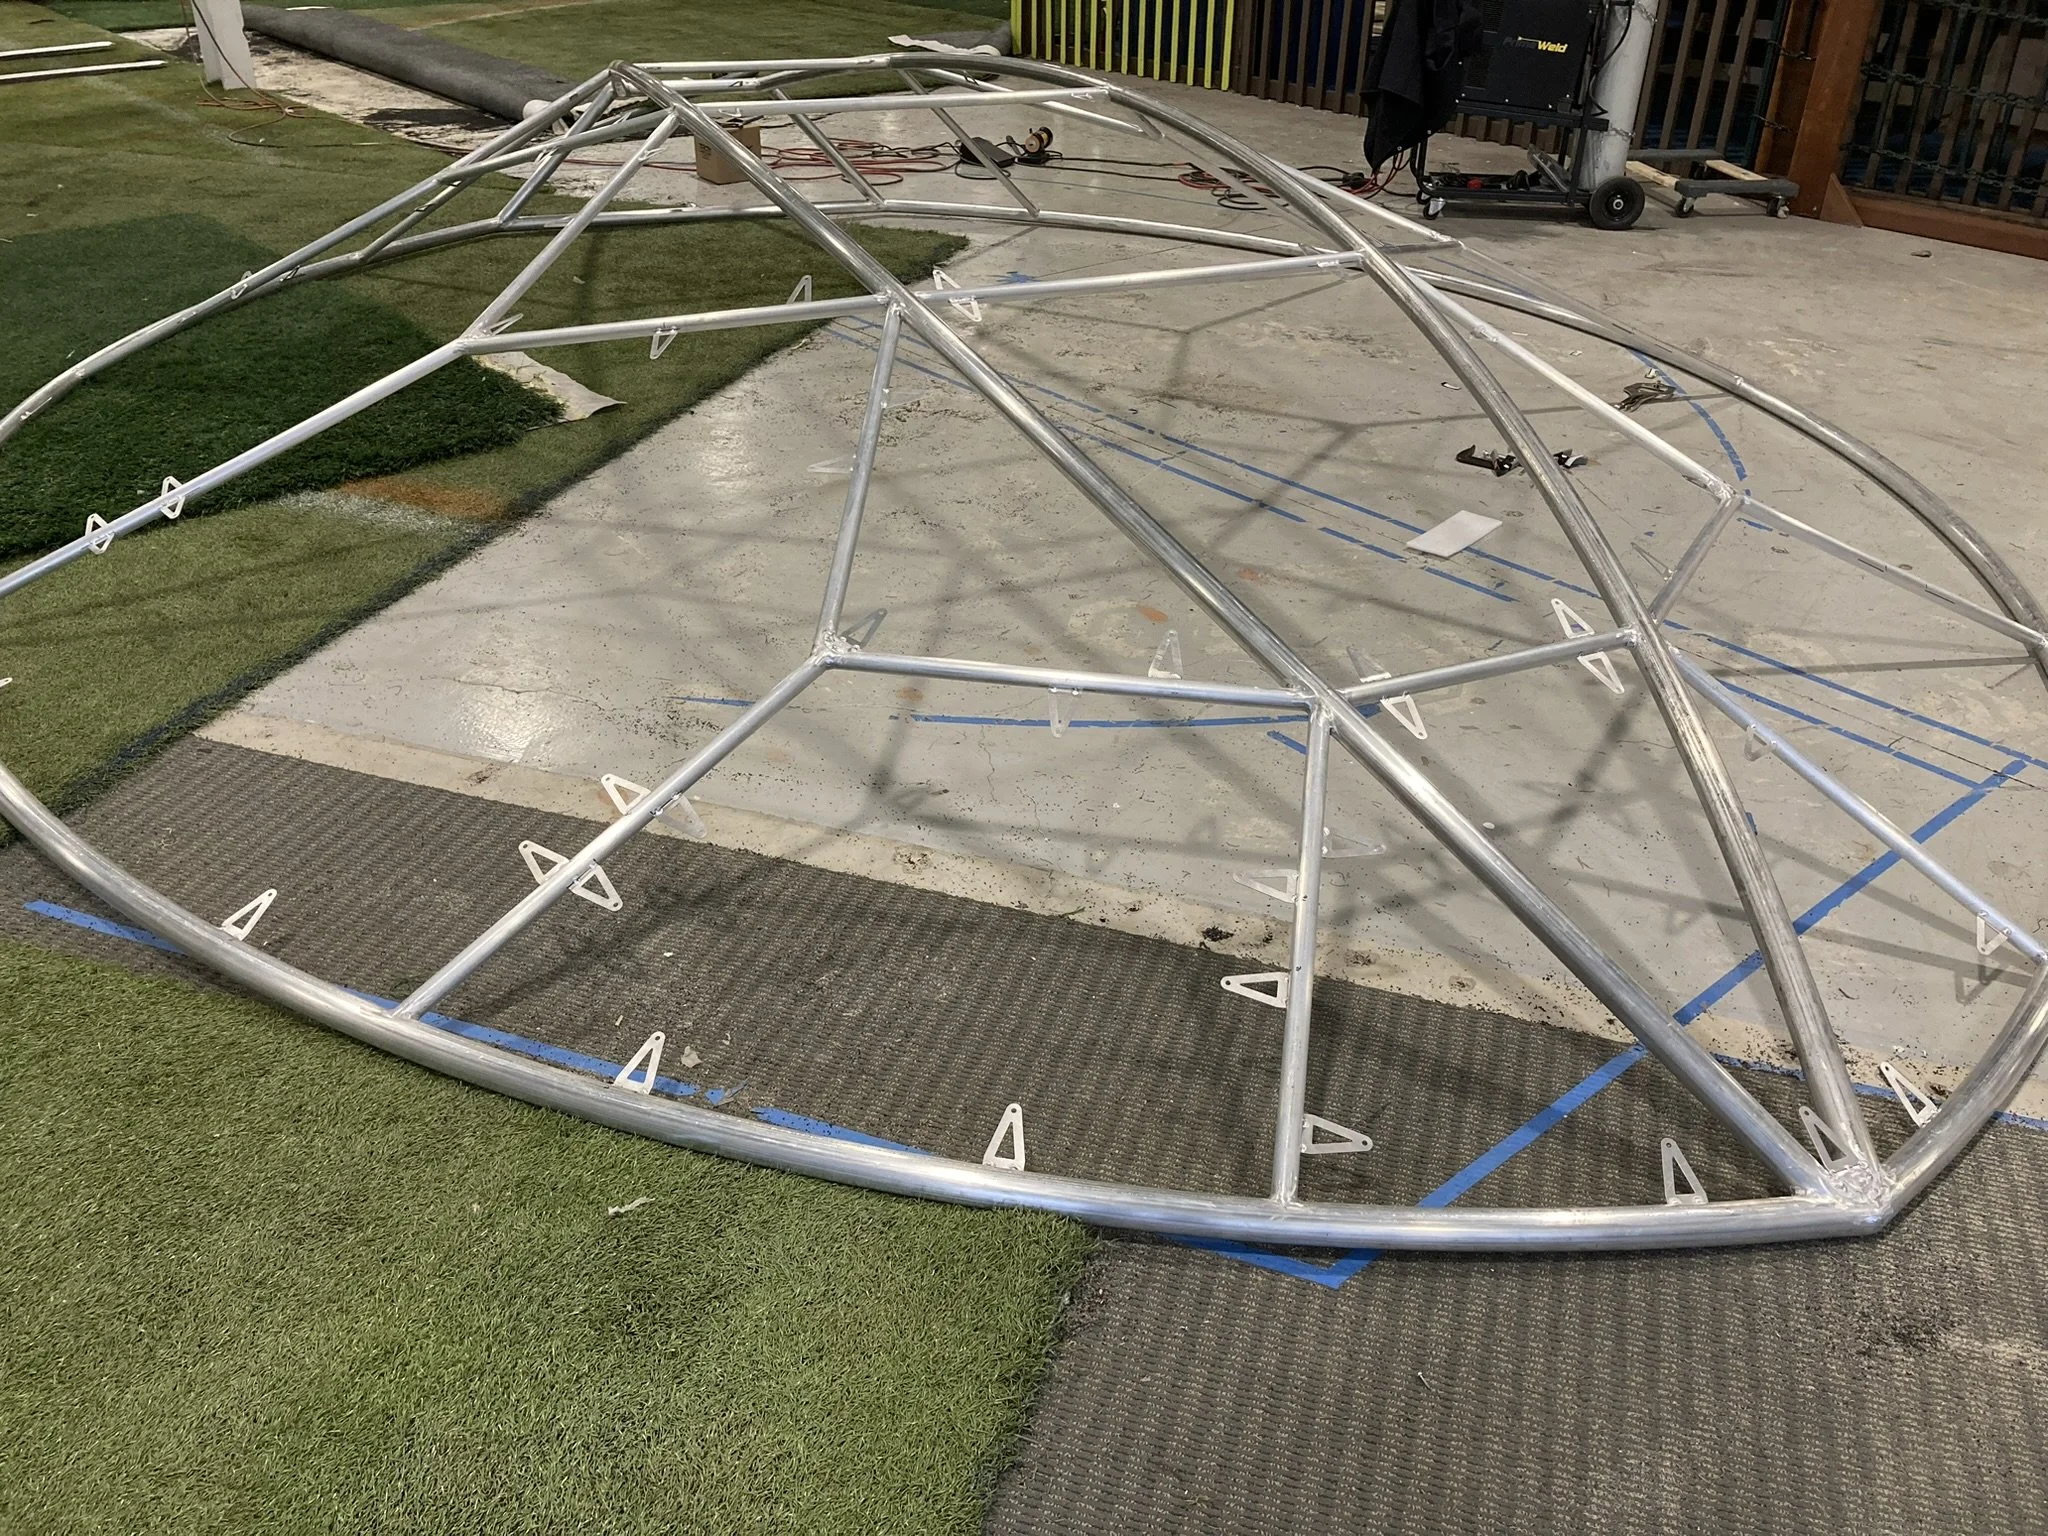
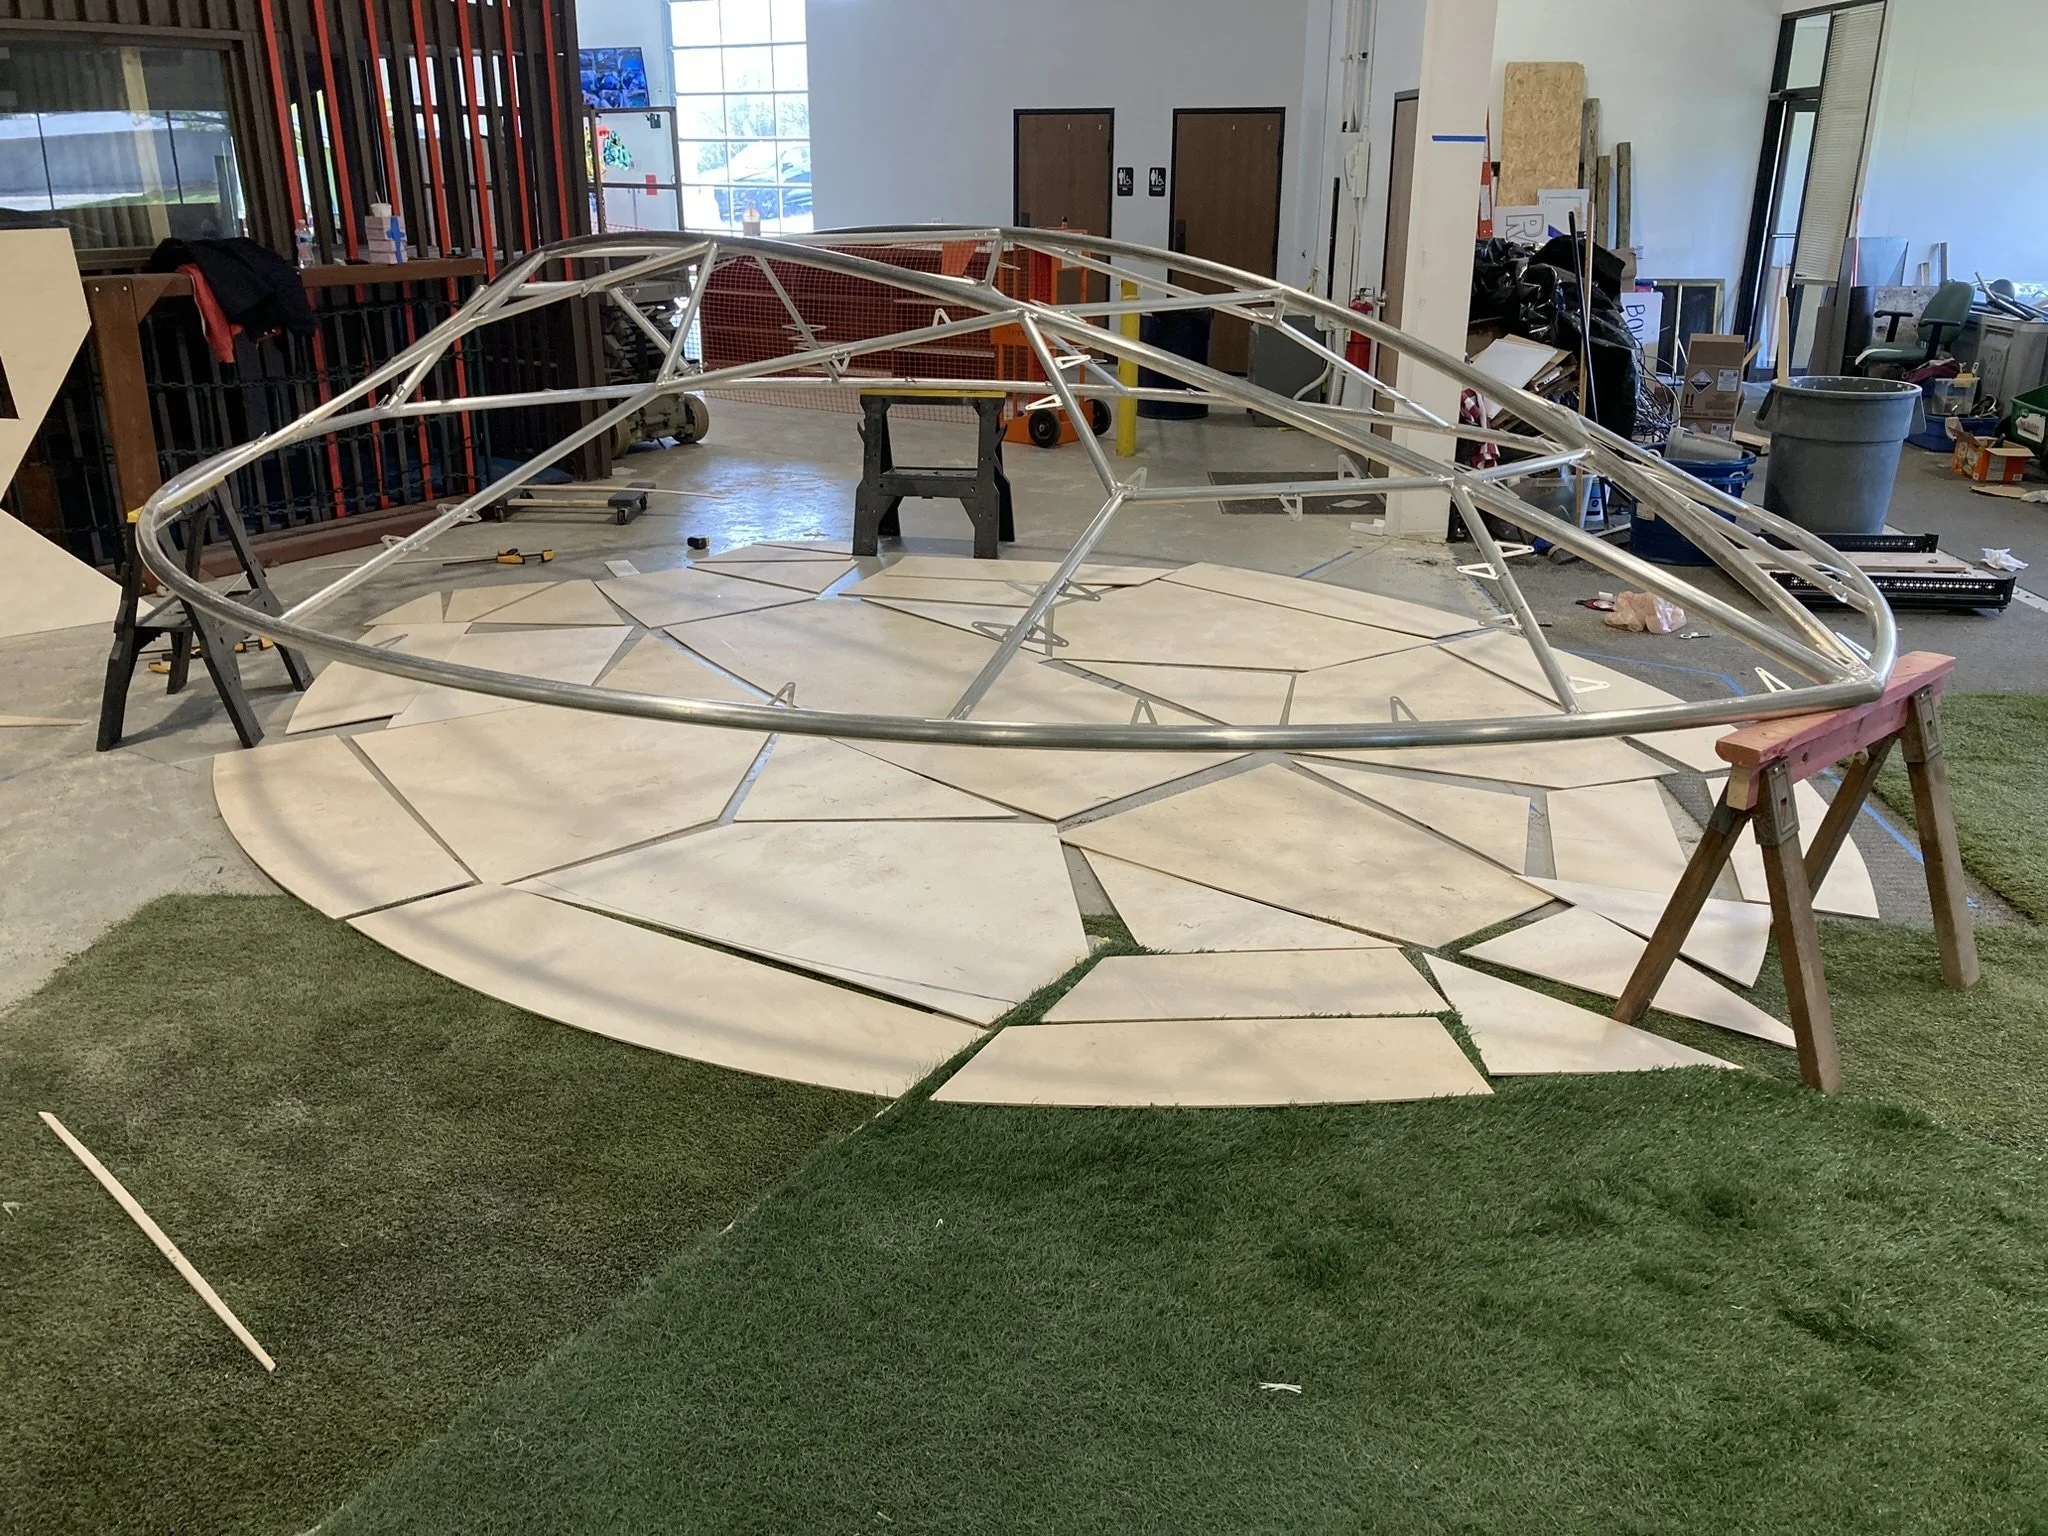
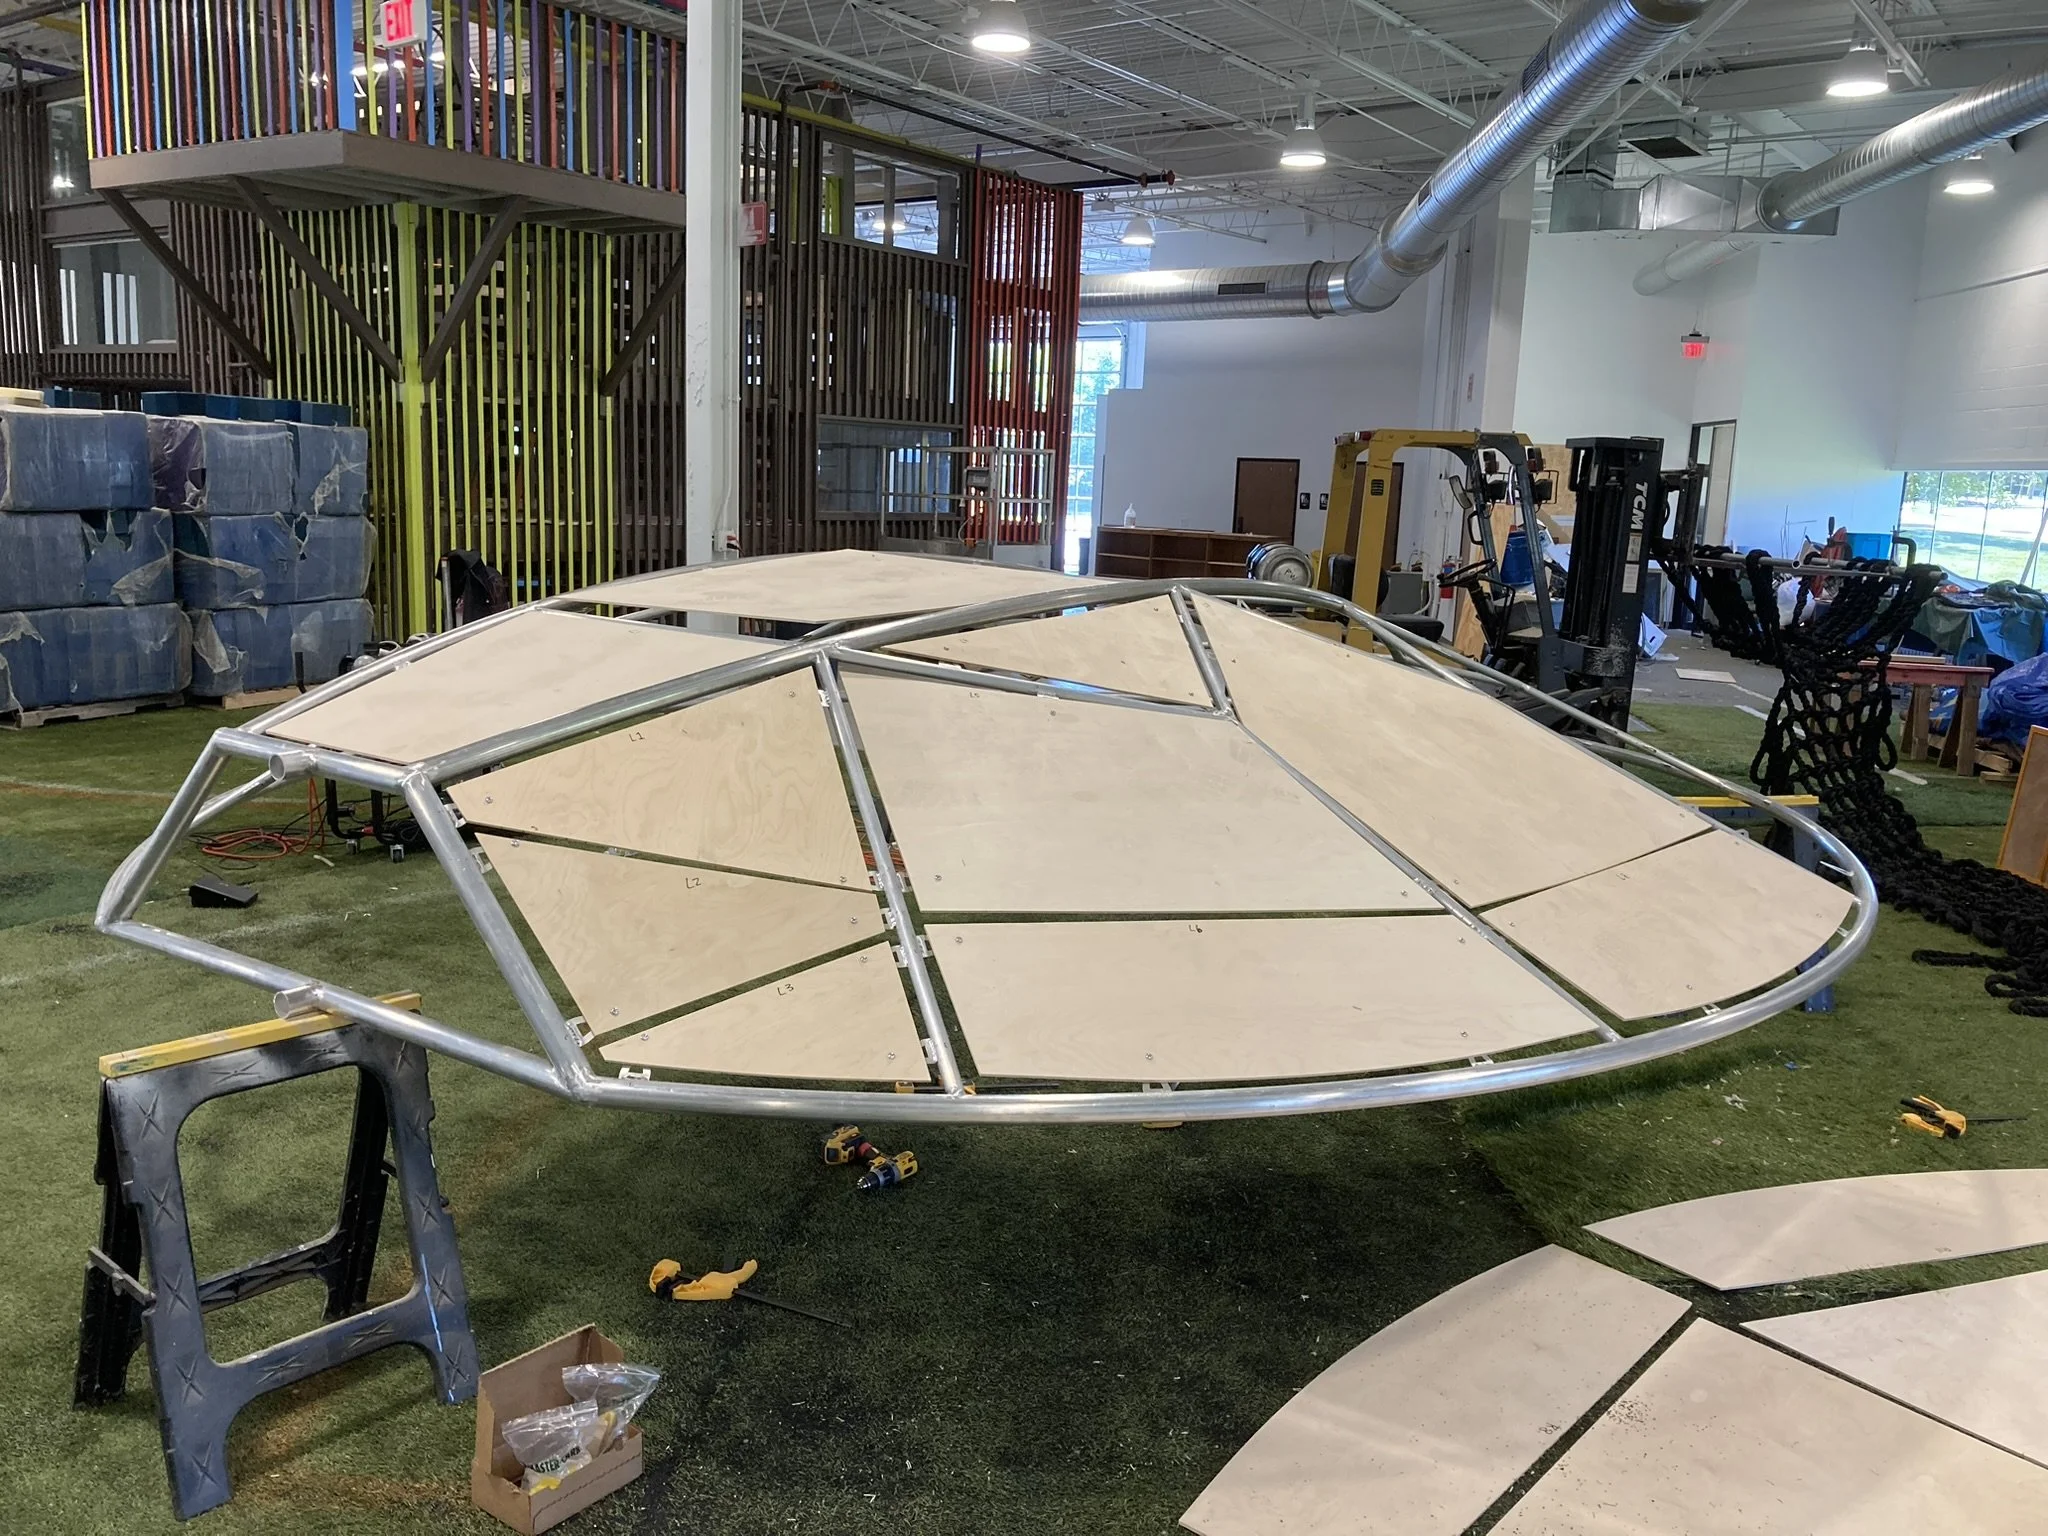
Shell Construction
-
![]()
Base Ring
-
![]()
Upper Ridges
-
![]()
Core Tubing Complete
-
![]()
Tube Notching
-
![]()
Segment Tubing
Smaller, 1” tubes between the larger tubes
-
![]()
Flipping the Shell
-
![]()
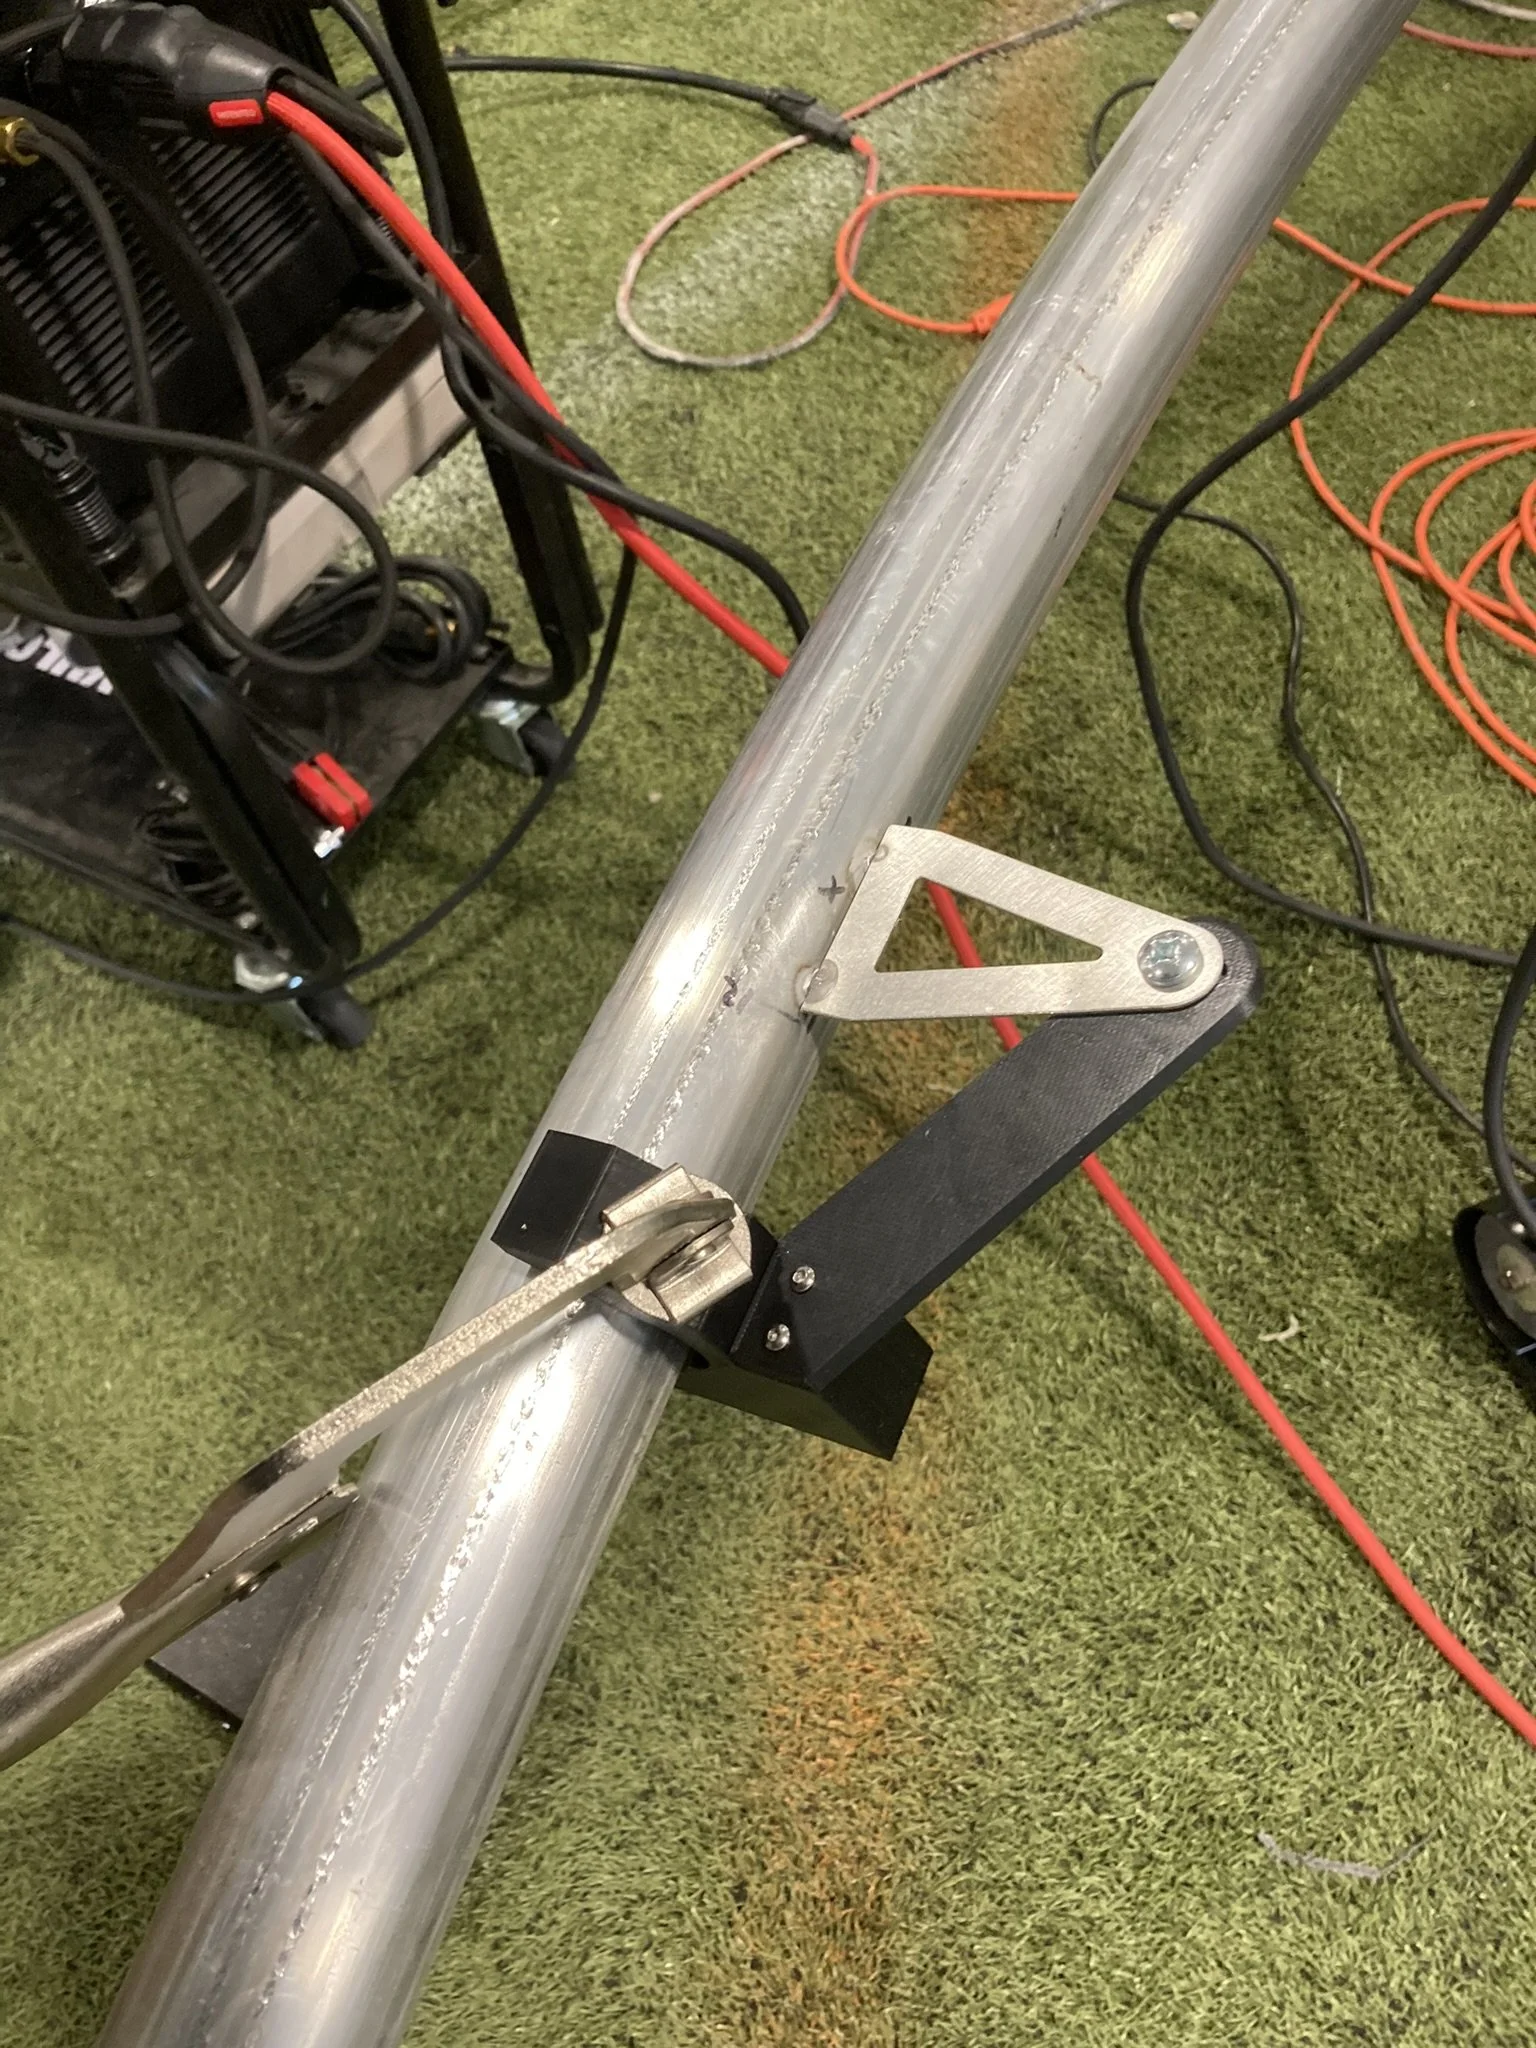
Tabs
Laser cut tabs for mounting shell pieces.
-
![]()
Tab Jig


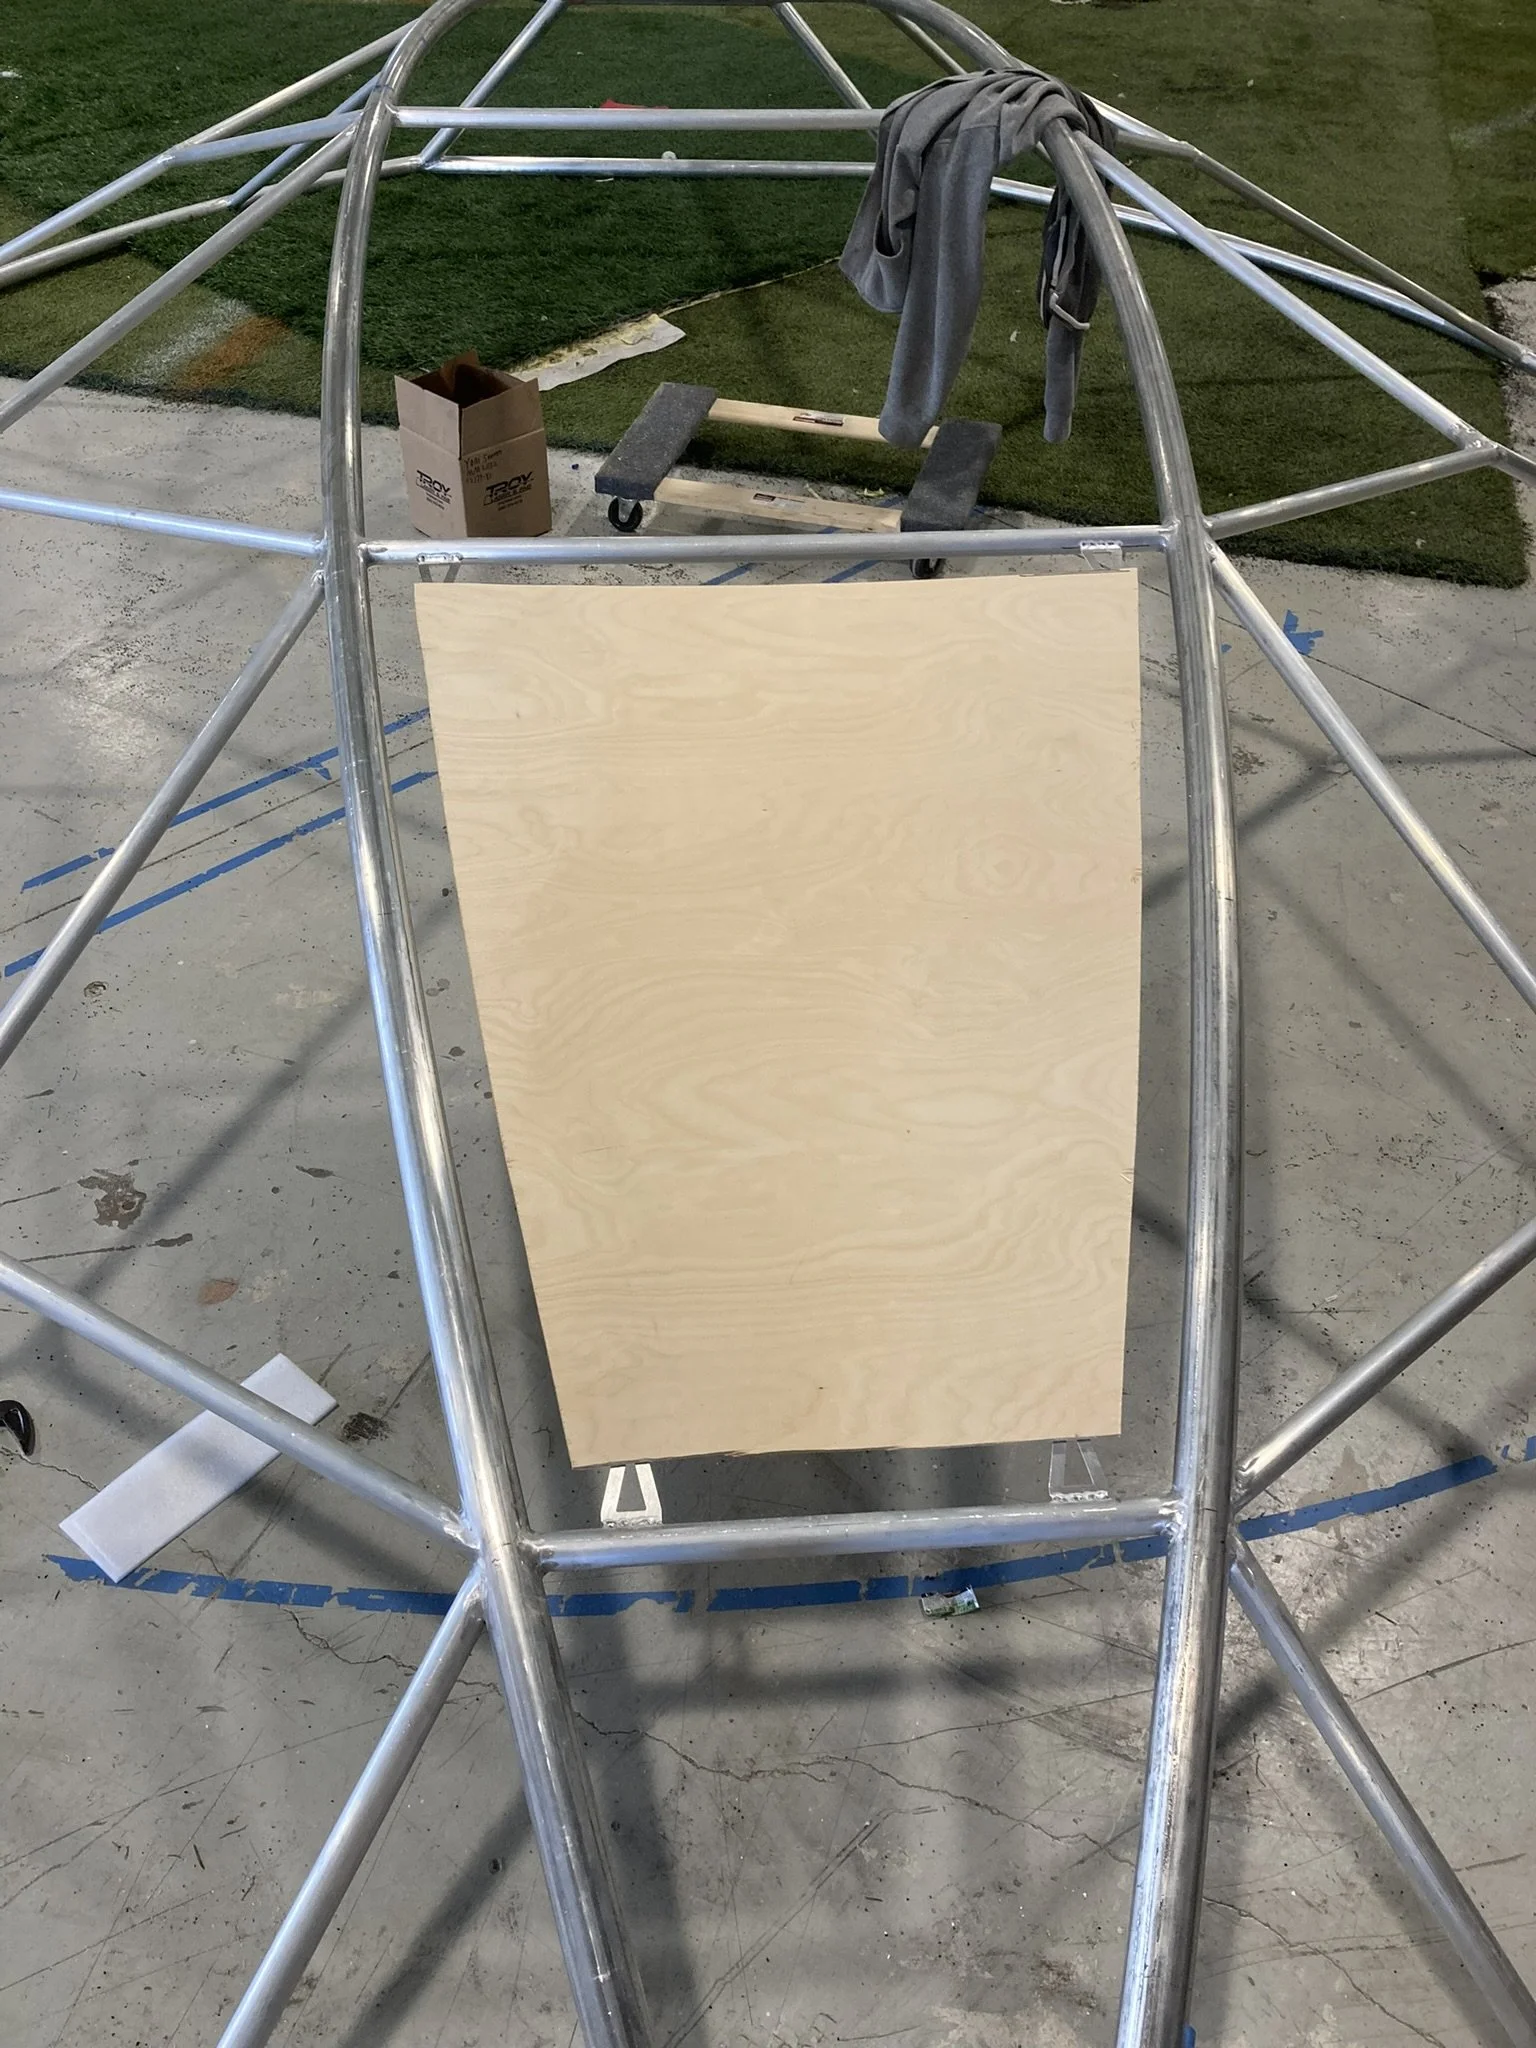
Shell Pieces
-
![]()
Cutting Shell Pieces
Each piece was cut approximately 1” from the tubing to allow some light through and show segmentation.
-
![]()
All Pieces Cut
Once each piece was cut, they get drilled to mount to the tabs.
-
![]()
Test Fitting
Shell pieces were test fit before painting.
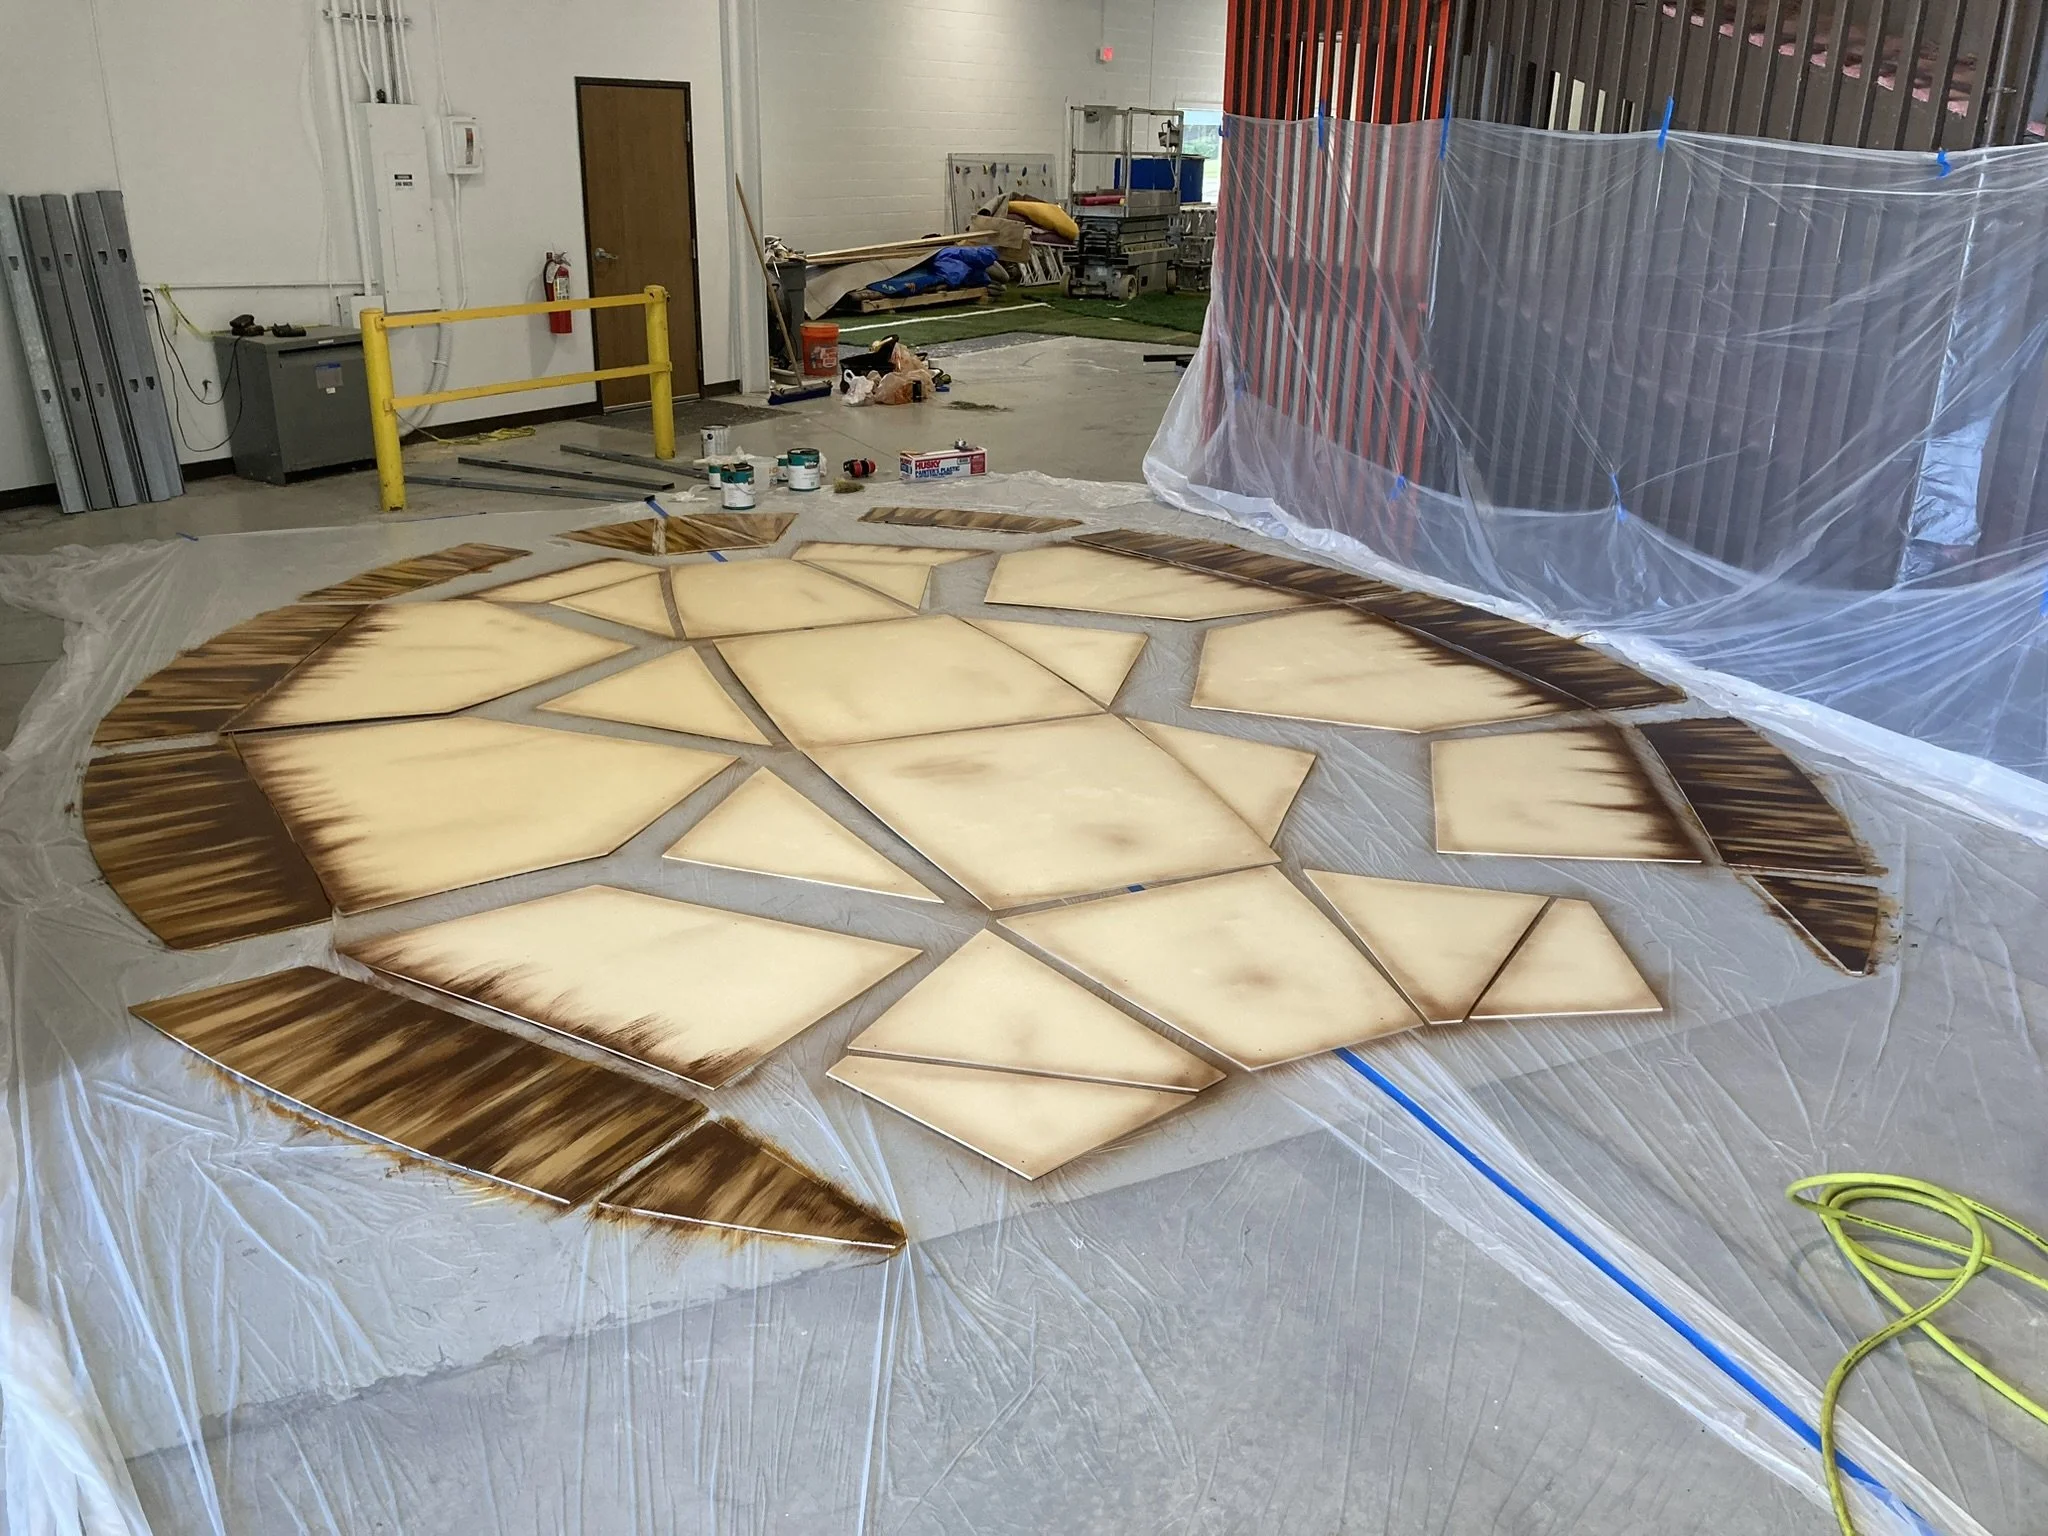
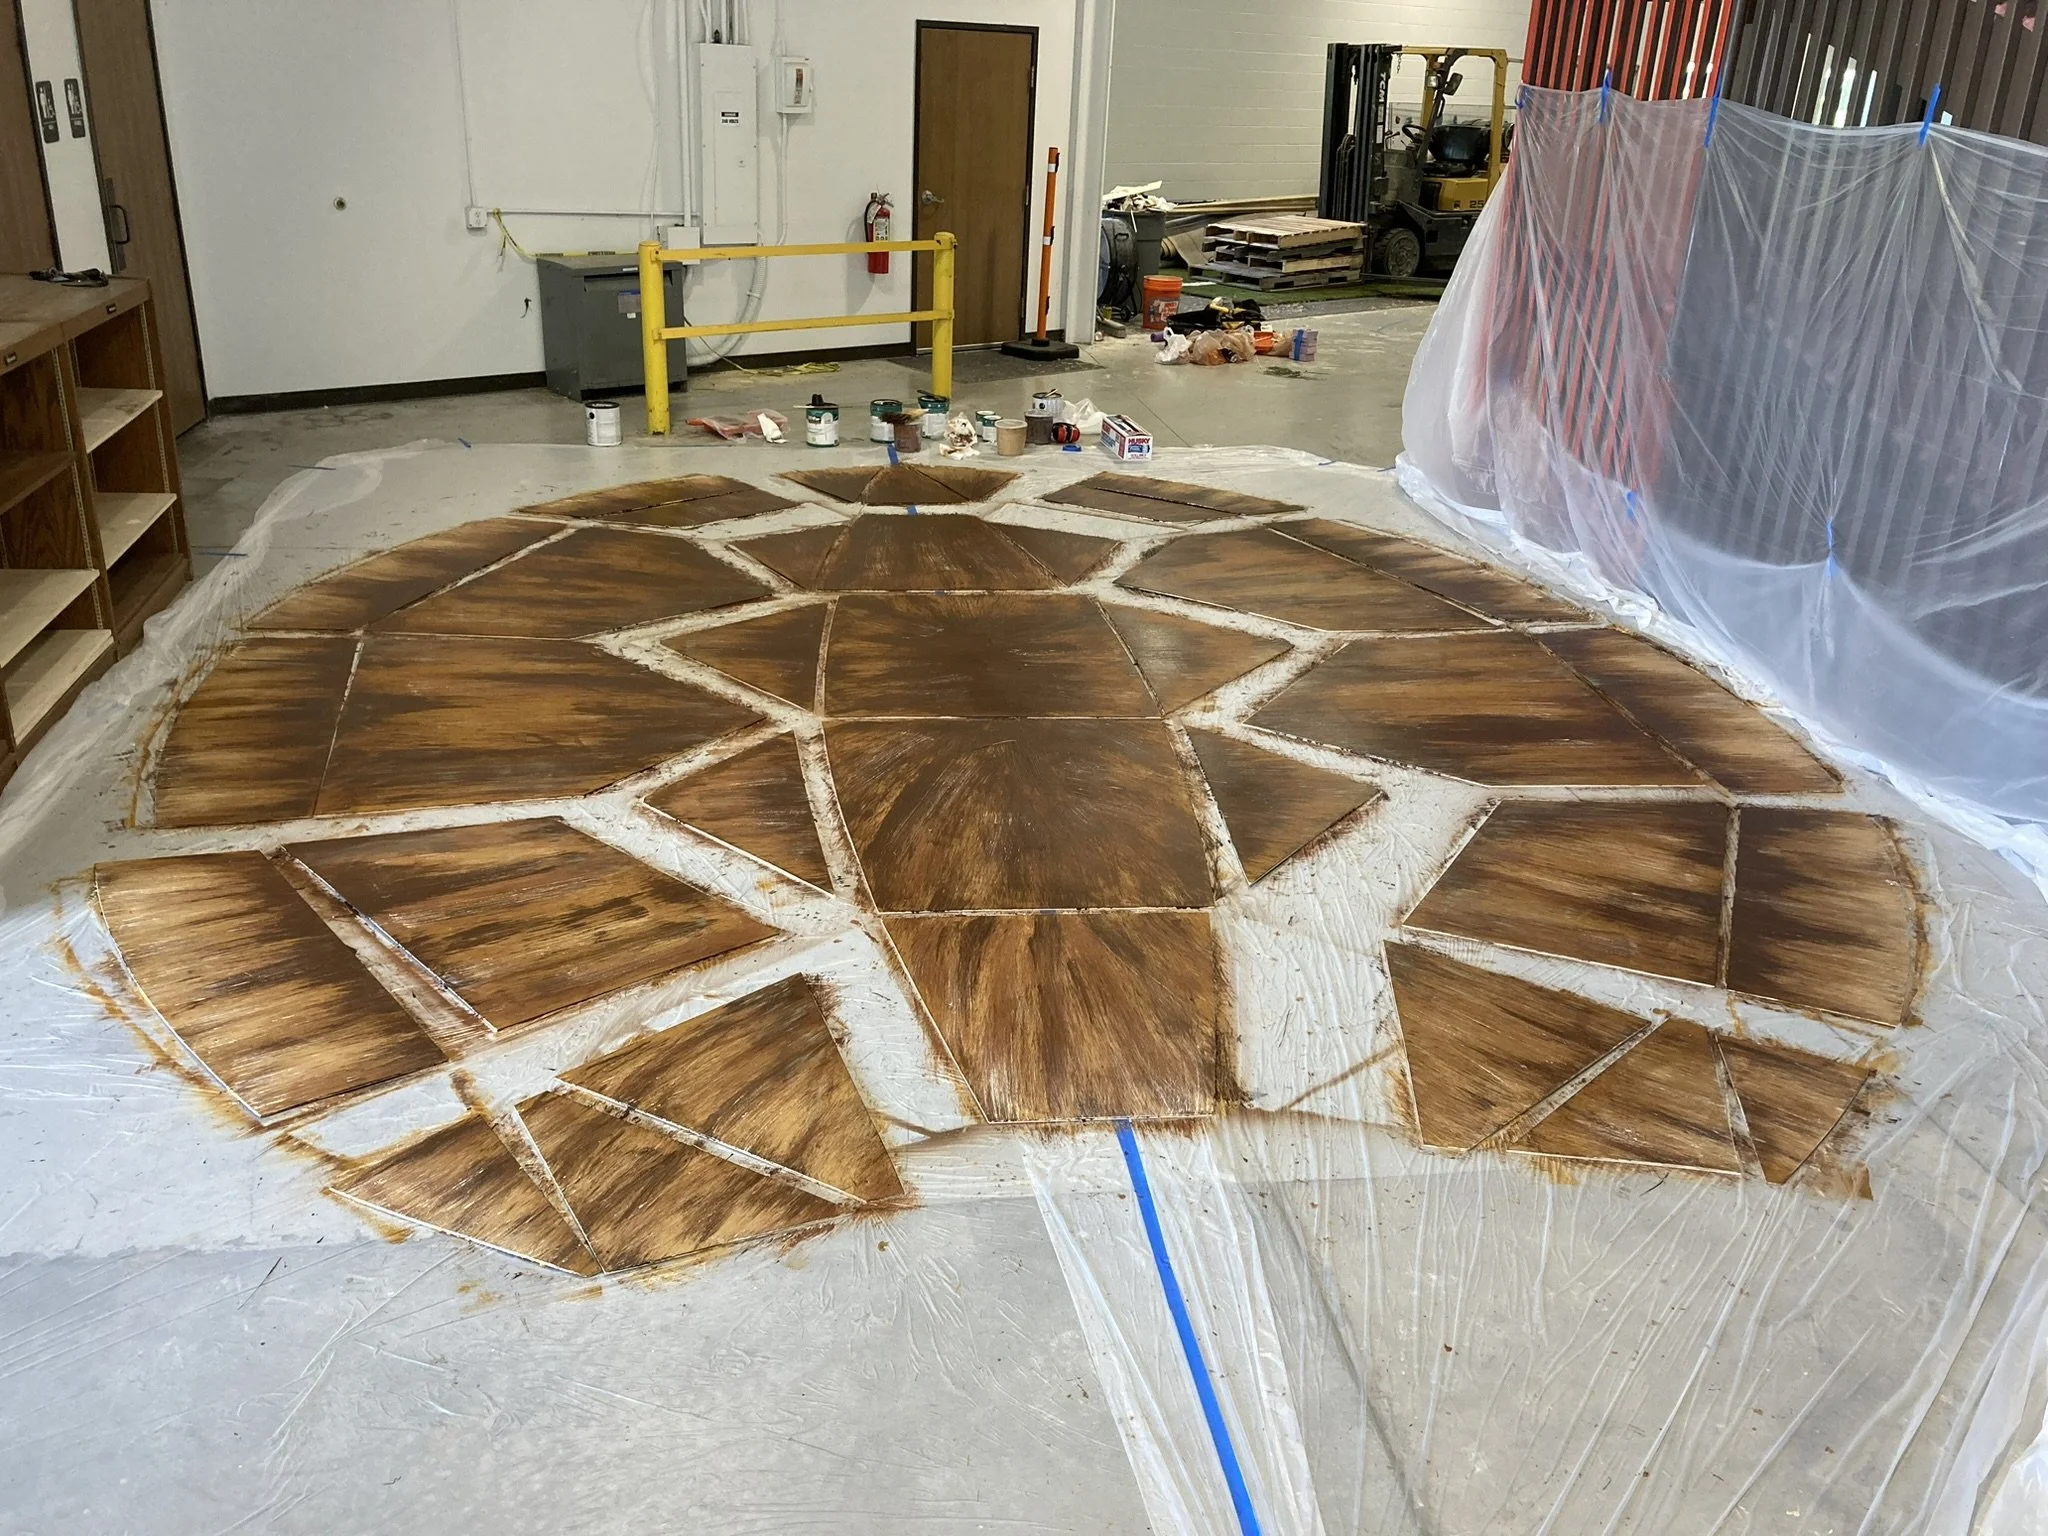
-
![]()
Underside Painting
The top and bottom of the shell were painted with different patterns to mimic a real turtle.
-
![]()
Top Side Painting
The streaky-ness of the shell was created using a straw broom as a paint brush.
-
![]()
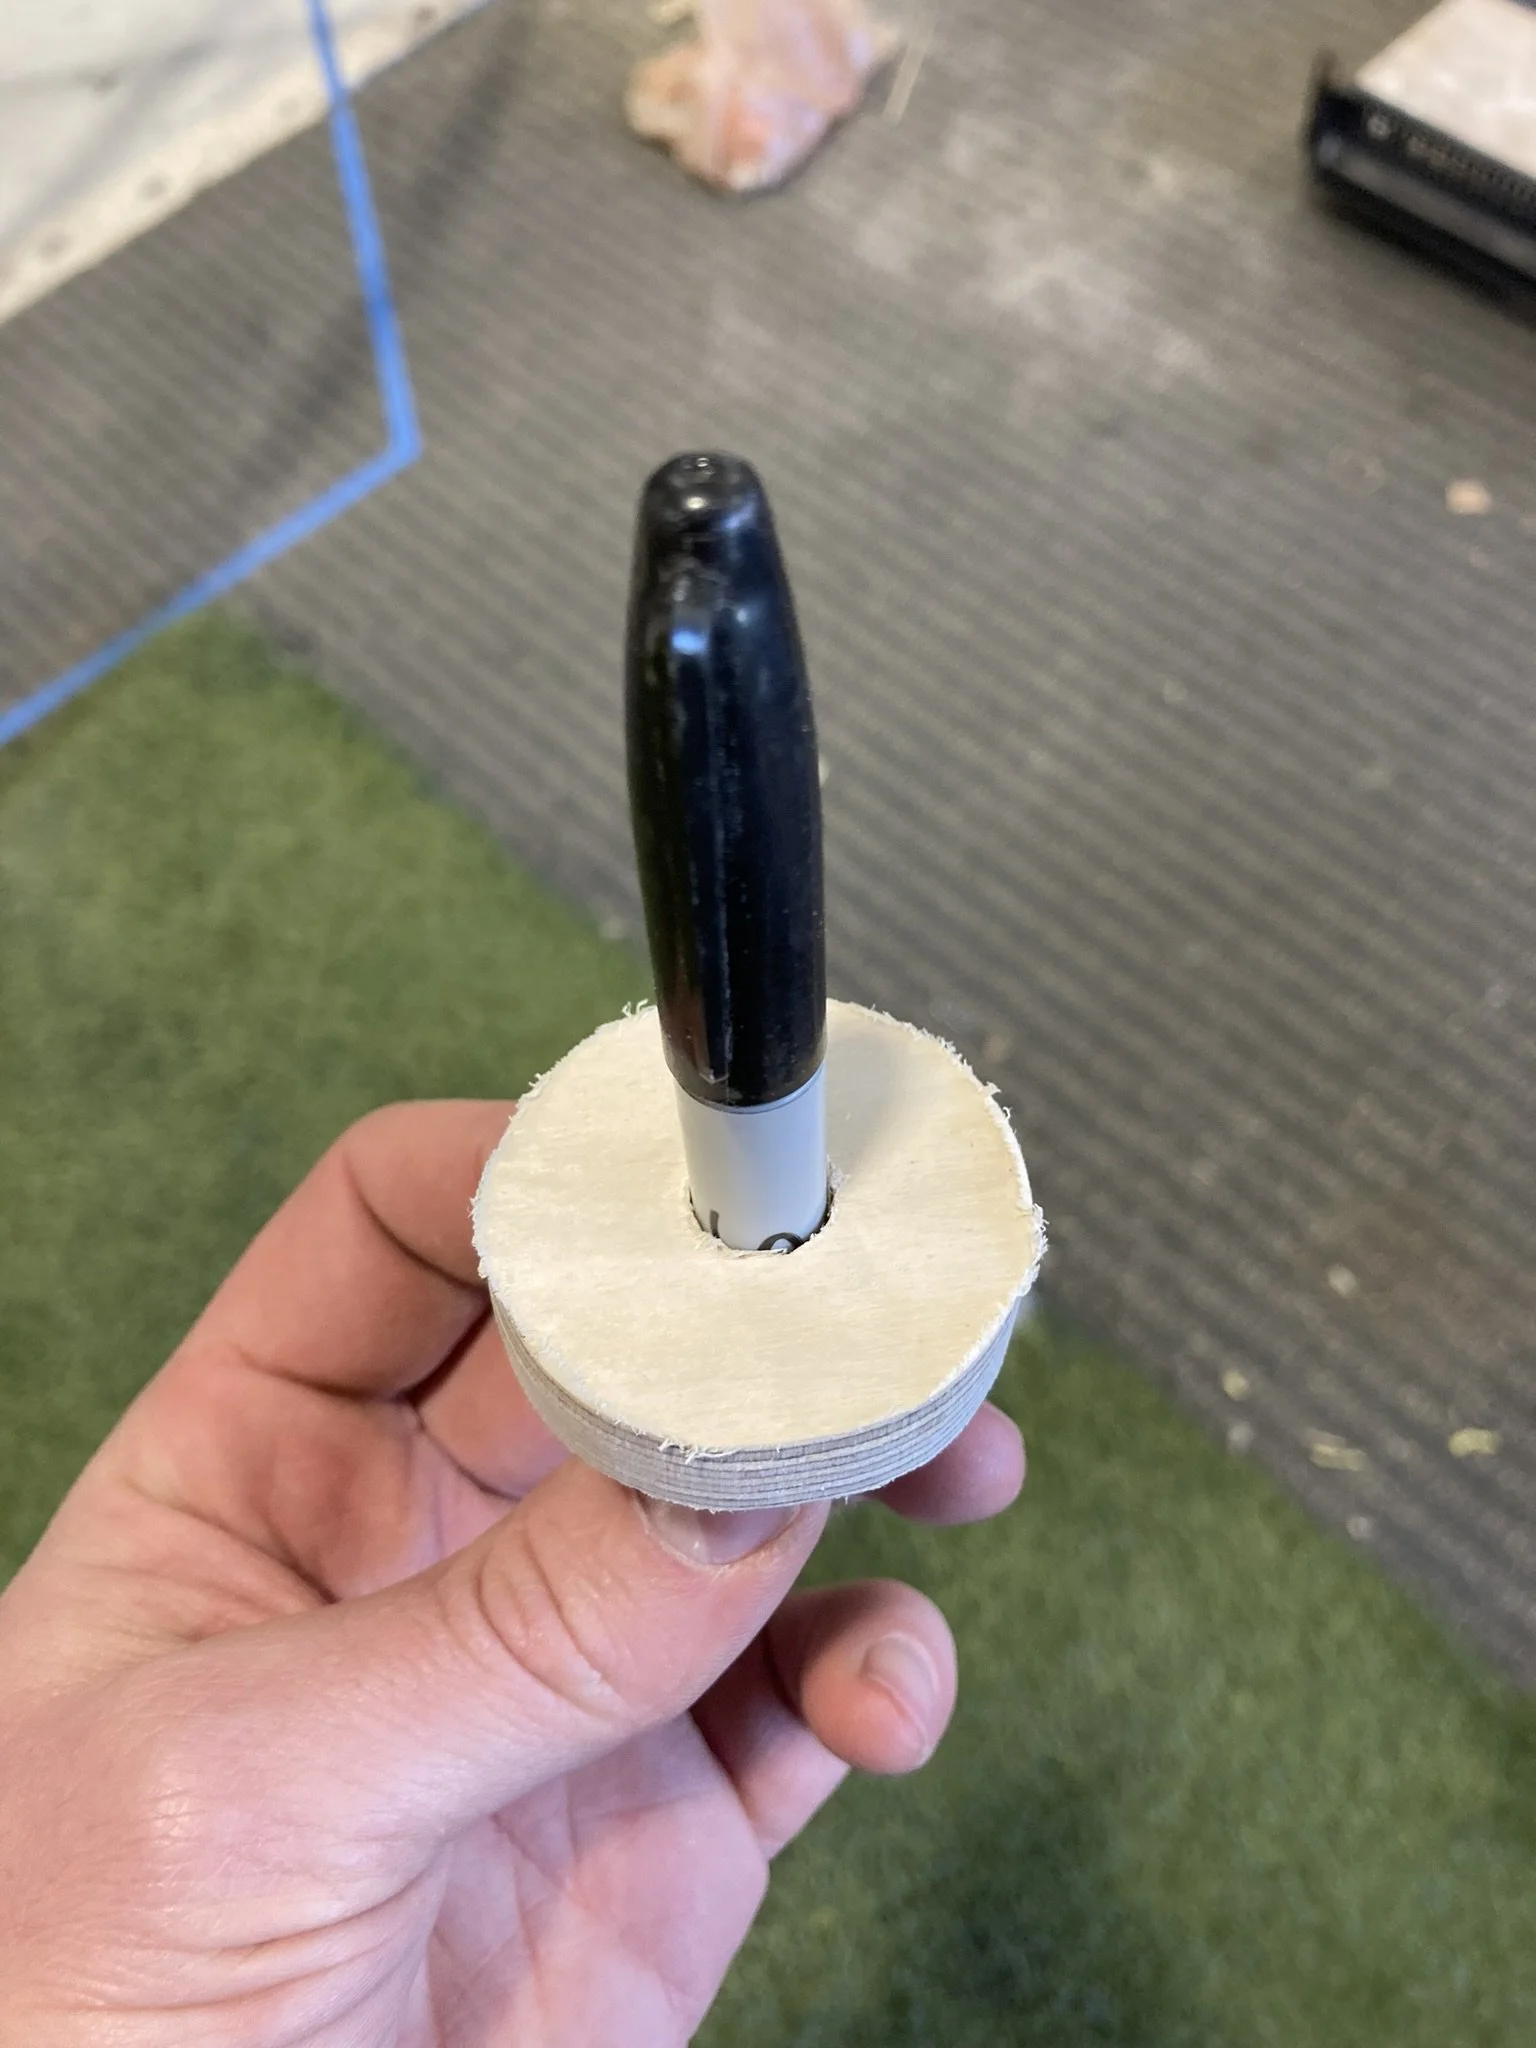
Marking Gauge
A simple device to get even spacing between the shell and the frame even with tricky geometries.
Assembly
-
![]()
Framework
Added structure, painted white, was mounted in the ceiling to hang the turtle.
-
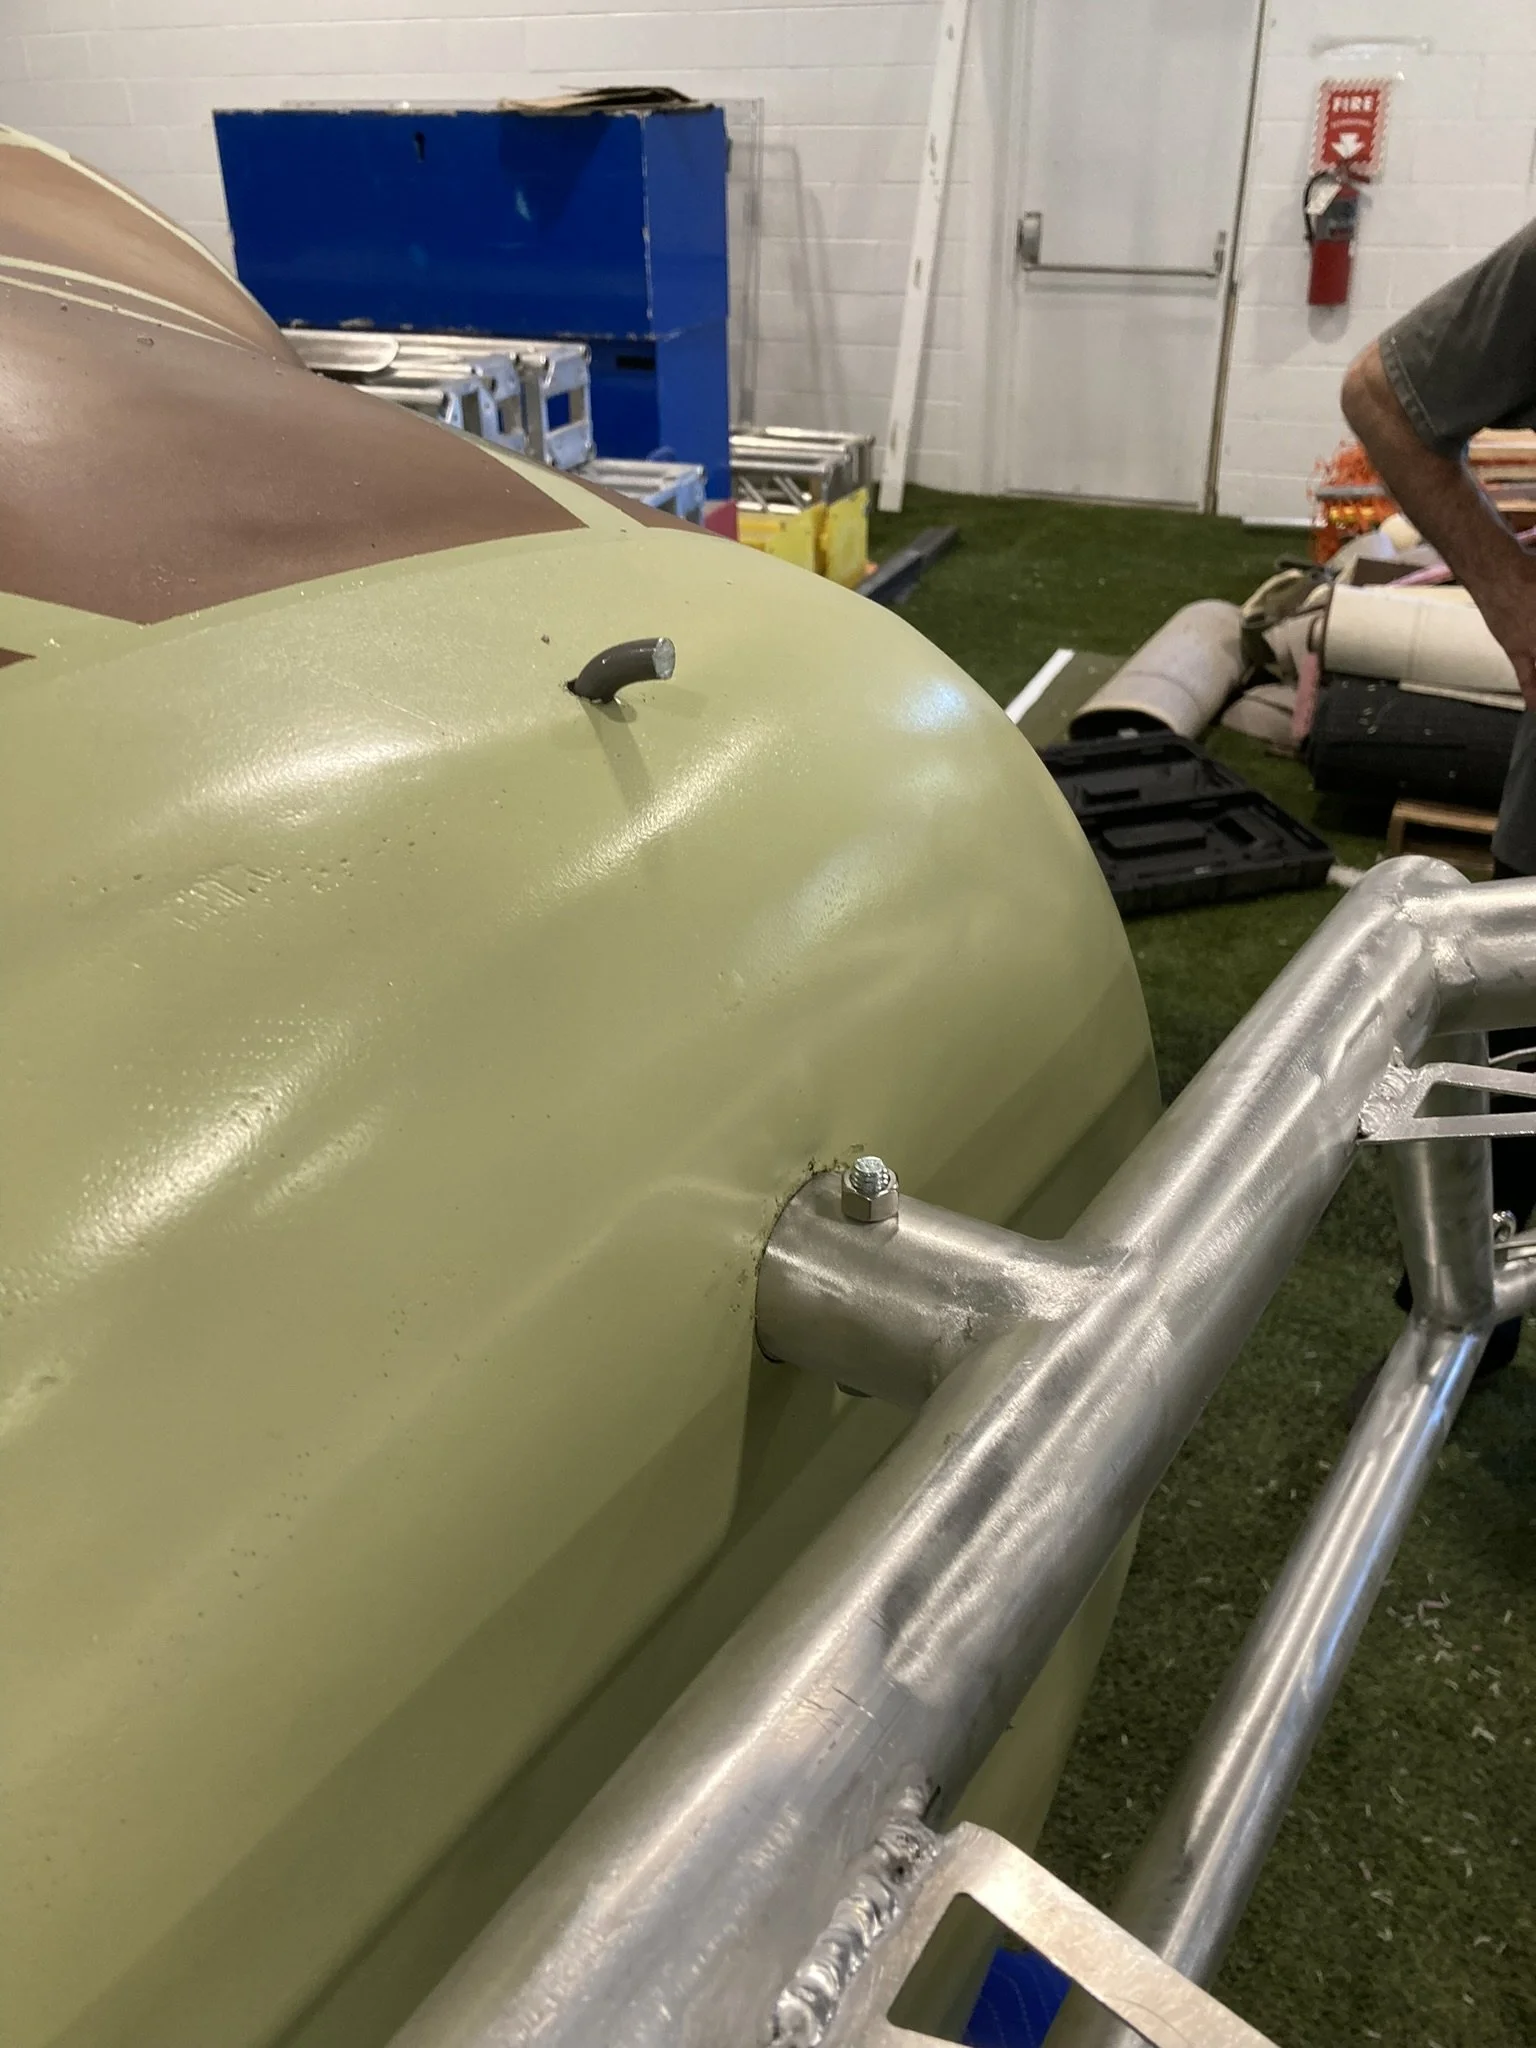
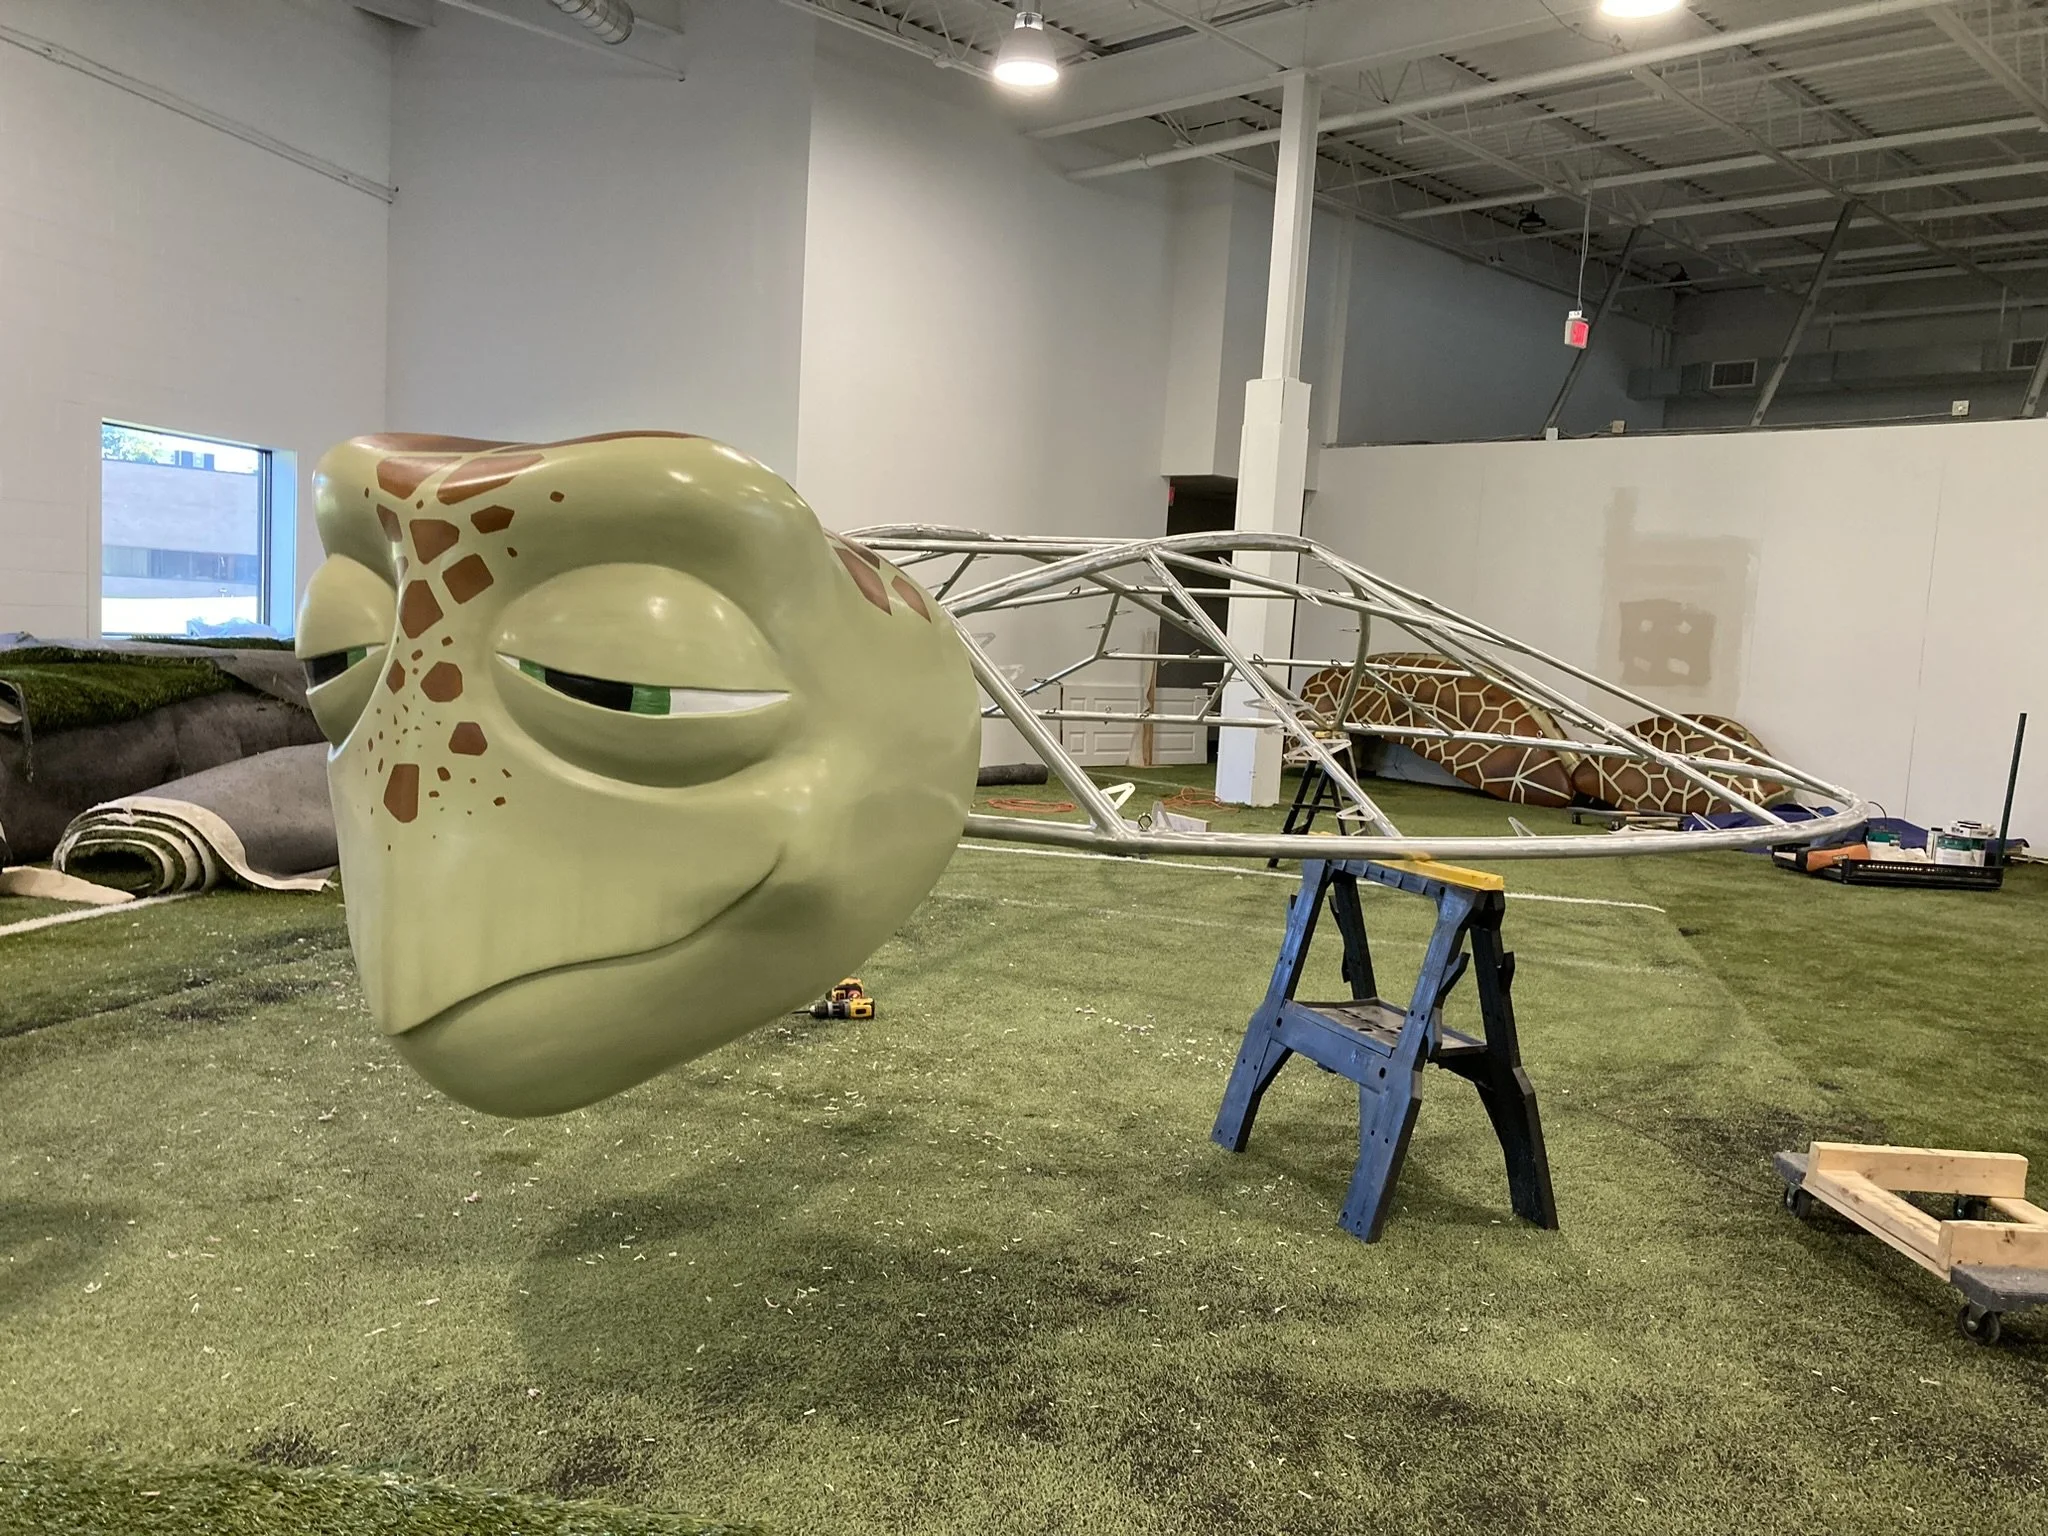
![]()
Attaching the Head
The head was built around a welded structure, then bolted back on when completed.
-
![]()
Head and Shell
Head was mounted to the shell before hanging due to access issues once in the air.
-
![]()
Hanging the Pieces
The shell and head were hung together. Each fin was hung and leveled separately.
-
![]()
Adding Shell Pieces
The Shell was mounted and bolted last due to the weight of lifting the plywood already in the shell.


Completed Turtle
-
![]()
Completed!
-
![]()
View from the Entrance
-
![]()
Placing the Last Shell Piece
-
![]()
View from inside the Building
-
![]()
Model vs Completed Turle


